

作者其他文章
- AOSP | Android 9 控制导航栏的隐藏与显示
- AOSP | Android 11 Settings 开发(01) 环境搭建
- AOSP | Android 11 Framework 修改记录(持续更新)
- AOSP | Android 9 Framework 修改记录(持续更新)
- AOSP | Android 9 由壁纸切换带来的手机主题变更及问题出现)
- AOSP | Android 9 过滤Recents
- AOSP | Android 9 APP源码移植到系统源码中进行编译
- 前端 | vue-echarts渲染时视图模糊的解决办法
前言
由于非商户号不能接入微信支付与支付宝支付的功能、同时第三方支付平台等收费的原因,使得个人学习者学习的同时又要交上真金白银。但第三方支付平台存在的不稳定因素(?),使得此次实验选择的环境是支付宝的沙箱环境。学习接入支付功能的话,沙箱环境足够用以学习。但是沙箱环境毕竟是虚拟的,如果你想真正实现业务,完成实际上的支付功能,那么上面所说的商户号与第三方支付平台,才是你的选择。
前期准备
- 沙箱环境配置 :具体参考如何使用沙箱环境
1.沙箱环境配置
如果你完成了上述所说的沙箱环境配置以后,那么可以进入沙箱应用,查看自己的具体配置内容。 
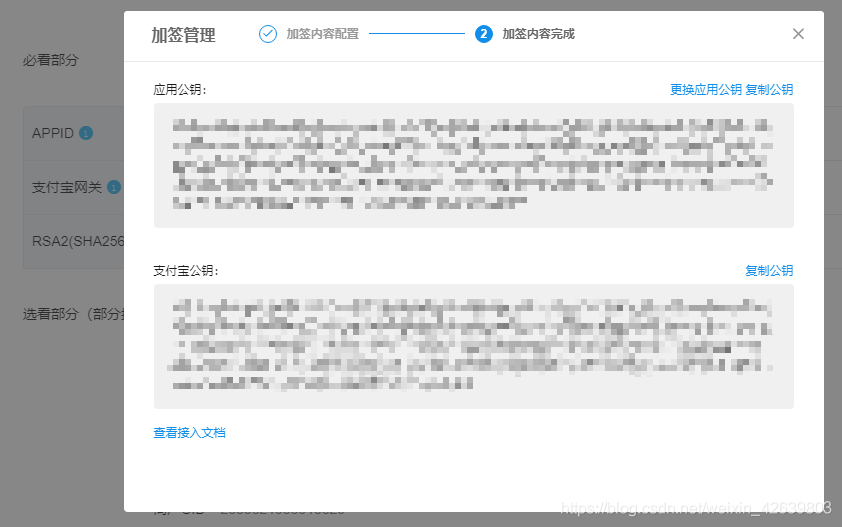 确认无误后,便可以开始进行开发。
2.创建SpringBoot项目,导入相关依赖
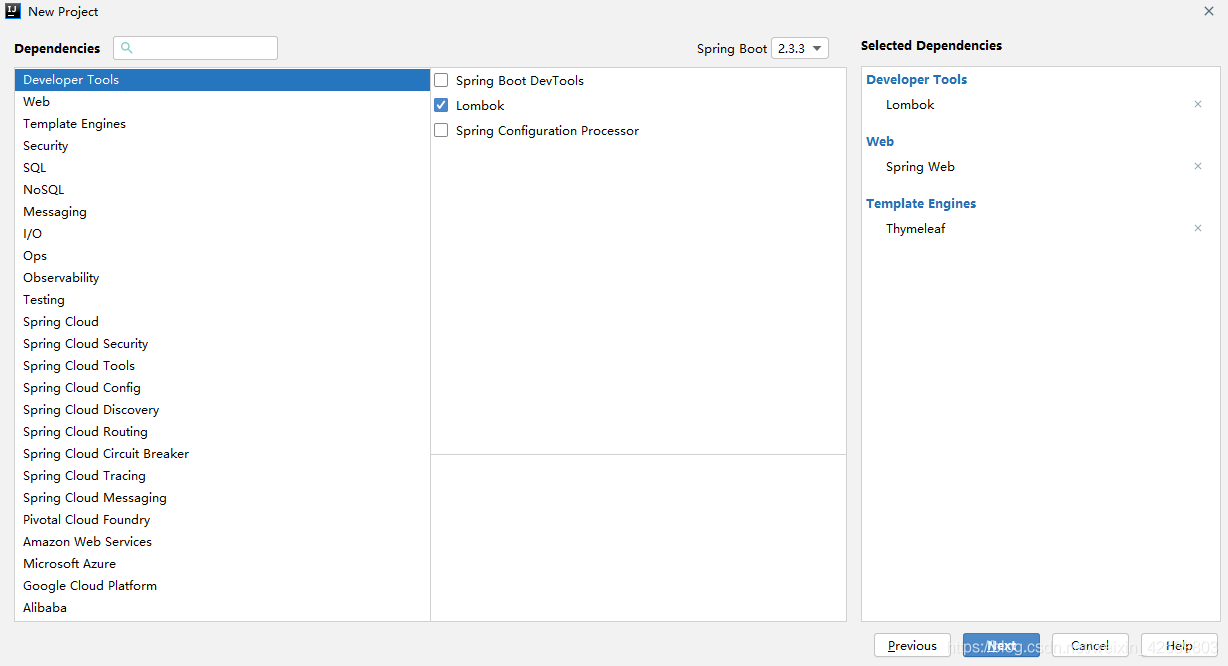 此处因节省开发时间,没有选择使用数据库,你可以根据自己需要进行选择。(使用Lombok时IDE需要安装Lombok插件) 同时在pom.xml导入支付宝支付SDK
<!-- 支付宝支付SDK -->
<dependency>
    <groupId>com.alipay.sdk</groupId>
    <artifactId>alipay-sdk-java</artifactId>
    <version>4.10.90.ALL</version>
</dependency>
至此,项目创建完成
3.创建沙箱环境配置文件
在resources目录下创建aliPayConfig.properties 文件,填入下列信息:
#以下六个信息可以从沙箱环境中获取,参考上述中1.沙箱环境配置
appid=沙箱环境中的appid
privateKey=沙箱环境中的应用私钥(理应保存在本地目录中,自寻查找)
publicKey=沙箱环境中的支付宝公钥(注意,不是应用公钥)
gatewayUrl=https://openapi.alipaydev.com/gateway.do
signType=RSA2(默认为:RSA2,根据公钥生成时选择的策略自行修改)
charset=UTF-8(默认为:UTF-8)

#同步通知与异步通知,具体配置可看下文(目录位置:7.1)
returnUrl=http://host:port/alipayReturnNotice
notifyUrl=http://host:port/alipayNotifyNotice
同时,可写一个类,用于读取该配置信息
@Component
@PropertySource(value = "classpath:alipayConfig.properties") //读取指定配置文件
public class PayConfig {

   //appId
   public static String app_id;
   //应用私钥
   public static String merchant_private_key;
   //支付宝公钥
   public static String alipay_public_key;
   //支付宝服务器主动通知商户服务器里指定的页面http/https路径(异步通知请求)
   public static String notify_url;
   //HTTP/HTTPS开头字符串(同步返回请求)
   public static String return_url;
   //商户生成签名字符串所使用的签名算法类型
   public static String sign_type;
   //请求使用的编码格式
   public static String charset;
   //网关链接
   public static String gatewayUrl;


   @Value("${appid}")
   public void setApp_id(String app_id) {
       PayConfig.app_id = app_id;
   }

   @Value("${privateKey}")
   public void setMerchant_private_key(String merchant_private_key) {
       PayConfig.merchant_private_key = merchant_private_key;
   }

   @Value("${publicKey}")
   public void setAlipay_public_key(String alipay_public_key) {
       PayConfig.alipay_public_key = alipay_public_key;
   }

   @Value("${notifyUrl}")
   public void setNotify_url(String notify_url) {
       PayConfig.notify_url = notify_url;
   }

   @Value("${returnUrl}")
   public void setReturn_url(String return_url) {
       PayConfig.return_url = return_url;
   }

   @Value("${signType}")
   public void setSign_type(String sign_type) {
       PayConfig.sign_type = sign_type;
   }

   @Value("${charset}")
   public void setCharset(String charset) {
       PayConfig.charset = charset;
   }

   @Value("${gatewayUrl}")
   public void setGatewayUrl(String gatewayUrl) {
       PayConfig.gatewayUrl = gatewayUrl;
   }
}
至此,沙箱环境就在项目中配置好。
4.商品列表页面编写
此处本应该从数据库中读取商品列表,再经Controller传到前端页面。为节省开发时间,直接编写静态页面内容。编写页面之前,可以选择引入Bootstrap框架,美化前端页面。  如果你想了解更多的关于Bootstrap的使用方法,可以点击此处。
- product.html
<!doctype html>
<html lang="zh" xmlns:th="http://www.thymeleaf.org">
<head>
<meta charset="UTF-8">
<link th:href="@{/customer/css/bootstrap.css}" rel="stylesheet">
<title>商品列表页面</title>
</head>
<body>
<div class="container">
<div class="row">
<div class="col-md-12"> </div>
</div>
<div class="row">
<div class="col-md-12"> </div>
</div>
<div class="row">
<div class="col-md-12"> </div>
</div>
<div class="row">
<div class="col-md-12"> </div>
</div>
<div class="row">
<div class="col-md-12">
<table class="table table-striped">
<thead>
<tr>
<th scope="col">产品编号</th>
<th scope="col">产品名称</th>
<th scope="col">产品价格</th>
<th scope="col">操作</th>
</tr>
</thead>
<tbody>
<tr>
<th scope="row">1001</th>
<td>苹果</td>
<td>0.01</td>
<td><a th:href="@{/checked(productId=1001)}">购买</a></td>
</tr>
<tr>
<th scope="row">1002</th>
<td>香蕉</td>
<td>0.02</td>
<td><a th:href="@{/checked(productId=1002)}">购买</a></td>
</tr>
</tbody>
</table>
</div>
</div>
</div>
<script th:src="@{/customer/js/jquery-3.4.0.js}"></script>
<script th:src="@{/customer/js/popper.min.js}"></script>
<script th:src="@{/customer/js/bootstrap.min.js}"></script>
</body>
</html>
- 编写完商品列表页面后,接着写一个PayController.java进行映射
@Controller
public class PayController {

    /**
     * 跳往商品列表页面
     * @return
     */
    @GetMapping("/to")
    public String toProduct() {
        return "product";
    }
}
- product.html中的按钮需要进行映射,继续编写PayController.java
	/**
     * 获取商品详情信息 跳往确认订单页面
     * @param productId 商品id
     * @param map
     * @return
     */
    @RequestMapping(value = "/checked")
    public Object goChecked(String productId, Map<String, Object> map) {
        //TODO 根据id获取产品 此处静态绑定 根据具体业务自行修改
        if (productId.equals("1001")) {
            map.put("id", "1001");
            map.put("name", "苹果");
            map.put("price", "0.01");
        } else {
            map.put("id", "1002");
            map.put("name", "香蕉");
            map.put("price", "0.02");
        }
        return "checked";
    }
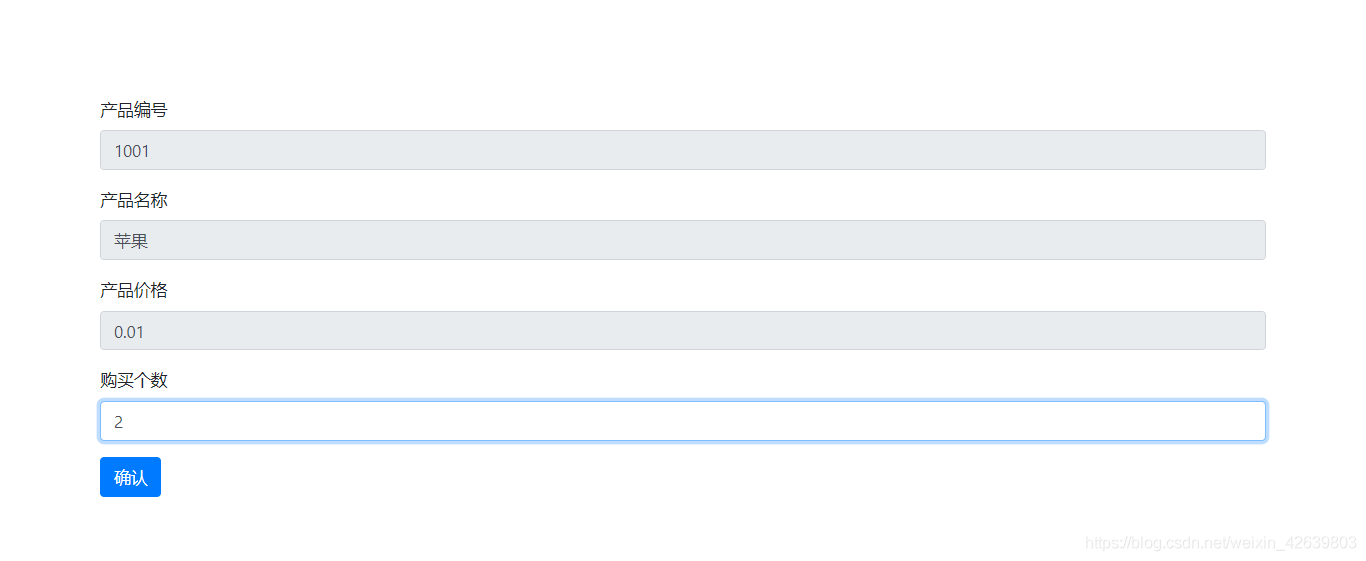
5. 编写checked.html
<!doctype html>
<html lang="zh" xmlns:th="http://www.thymeleaf.org">
<head>
<meta charset="UTF-8">
<link th:href="@{/customer/css/bootstrap.css}" rel="stylesheet">
<title>购物车</title>
</head>
<body>
<div class="container">
<div class="row">
<div class="col-md-12"> </div>
</div>
<div class="row">
<div class="col-md-12"> </div>
</div>
<div class="row">
<div class="col-md-12"> </div>
</div>
<div class="row">
<div class="col-md-12"> </div>
</div>
<div class="row">
<div class="col-md-12">
<form method="post">
<input type="hidden" id="productId" name="productId" value="${id}"/>
<div class="form-group">
<label for="id">产品编号</label>
<input type="text" class="form-control" id="id" th:value="${id}" readonly>
</div>
<div class="form-group">
<label for="name">产品名称</label>
<input type="text" class="form-control" id="name" th:value="${name}" readonly>
</div>
<div class="form-group">
<label for="price">产品价格</label>
<input type="text" class="form-control" id="price" th:value="${price}" readonly>
</div>
<div class="form-group">
<label for="buyCounts">购买个数</label>
<input type="text" class="form-control" id="buyCounts" name="buyCounts">
</div>
<input class="btn btn-primary" type="button" value="确认" onclick="toPay()"/>
</form>
</div>
</div>
</div>
<script th:src="@{/customer/js/jquery-3.4.0.js}"></script>
<script th:src="@{/customer/js/popper.min.js}"></script>
<script th:src="@{/customer/js/bootstrap.min.js}"></script>
<script type="text/javascript">
function toPay() {
var count = $("#buyCounts").val()
if (count==0 || !count) {
alert("请输入购买数量")
return;
}
$.ajax({
url: "/saveOrder",
type: "POST",
data: {
"productId": $("#productId").val(),
"buyCounts": $("#buyCounts").val(),
"price": $("#price").val()
},
dataType: "json",
success: function (data) {
if (data.status == 200 && data.msg == "OK") {
// 保存订单后,进入支付页面
window.location.href = "/pay?orderId=" + data.data;
} else {
alert(data.msg);
}
}
});
}
</script>
</body>
</html>
- toPay()事件中,ajax异步提交了一个Json数据,我们可以新建一个Product实体类,对Json数据进行接收
/**
 * 下单商品实体类
 * <p>
 */
@Data
@Getter
@Setter
@NoArgsConstructor
@AllArgsConstructor
public class Product {
	//商品id
    private String productId;
    //商品购买数量
    private String buyCounts;
    //商品单价
    private Double price;
}
- 同时,再编写一个通用结果返回类CommonResult,将数据通过Json格式返回给前端
/**
 * 通用结果返回
 * <p>
 */
@Data
@Getter
@Setter
@NoArgsConstructor
public class CommonResult {

    // 定义jackson对象
    private static final ObjectMapper MAPPER = new ObjectMapper();

    // 响应业务状态
    private Integer status;

    // 响应消息
    private String msg;

    // 响应中的数据
    private Object data;

    private String ok;

    public CommonResult(Object data) {
        this.status = 200;
        this.msg = "OK";
        this.data = data;
    }

    public CommonResult(Integer status, String msg, Object data) {
        this.status = status;
        this.msg = msg;
        this.data = data;
    }

    public static CommonResult ok() {
        return new CommonResult(null);
    }

    public static CommonResult ok(Object data) {
        return new CommonResult(data);
    }
}
- 对toPay()中的ajax实现映射,继续编写PayController.java
	/**
     * 保存订单
     * @param order
     * @return
     * @throws Exception
     */
    @ResponseBody
    @RequestMapping(value = "/saveOrder")
    public CommonResult saveOrder(Product product) throws Exception {
        //TODO 根据product生成订单,此处直接返回,不做具体业务
        return CommonResult.ok("orderid");
    }
-
上面 saveOrder方法中,直接返回ok给前端,返回后ajax进行成功函数的回调

-
根据判断编写/pay映射,继续编写PayController.java
	/**
     * 跳往支付页面
     *
     * @param orderId
     * @return
     * @throws Exception
     */
    @RequestMapping(value = "/pay")
    public Object goPay(String orderId, Map<String, Object> map) throws Exception {
        //TODO 根据orderId实现业务,此处静态绑定,你根据具体业务自行修改
        map.put("orderId", UUID.randomUUID().toString().replace("-", ""));
        map.put("pName","苹果");
        map.put("orderAmount","0.02");
        map.put("buyCounts","2");
        return "pay";
    }
7. 根据返回的pay编写pay.html页面
<!DOCTYPE html>
<html lang="zh" xmlns:th="http://www.thymeleaf.org">
<head>
<meta http-equiv="Content-Type" content="text/html; charset=UTF-8">
<link th:href="@{/customer/css/bootstrap.css}" rel="stylesheet">
<title>确认订单</title>
</head>
<body>
<div class="container">
<div class="row">
<div class="col-md-12"> </div>
</div>
<div class="row">
<div class="col-md-12"> </div>
</div>
<div class="row">
<div class="col-md-12"> </div>
</div>
<div class="row">
<div class="col-md-12"> </div>
</div>
<div class="row">
<div class="col-md-12">
<form id="payForm" th:action="@{/aliPay}" method="post">
<input type="hidden" name="orderId" th:value="${orderId}"/>
<div class="form-group">
<label for="orderId">订单编号</label>
<input type="text" class="form-control" id="orderId" th:value="${orderId}" readonly>
</div>
<div class="form-group">
<label for="pName">产品名称</label>
<input type="text" class="form-control" id="pName" th:value="${pName}" readonly>
</div>
<div class="form-group">
<label for="orderAmount">订单价格</label>
<input type="text" class="form-control" id="orderAmount" th:value="${orderAmount}" readonly>
</div>
<div class="form-group">
<label for="buyCounts">购买个数</label>
<input type="text" class="form-control" id="buyCounts" th:value="${buyCounts}" readonly>
</div>
<input class="btn btn-primary" type="submit" value="支付宝支付">
</form>
</div>
</div>
</div>
<script th:src="@{/customer/js/jquery-3.4.0.js}"></script>
<script th:src="@{/customer/js/popper.min.js}"></script>
<script th:src="@{/customer/js/bootstrap.min.js}"></script>
</body>
</html>
- 表单提交到/aliPay,继续编写PayController.java,进行映射
	/**
     * 前往支付宝第三方网关进行支付
     * @param orderId
     * @return
     * @throws Exception
     */
    @ResponseBody
    @RequestMapping(value = "/aliPay", produces = "text/html; charset=UTF-8")
    public String goAlipay(String orderId) {
    	//接口调用配置初始化
        AlipayClient alipayClient = new DefaultAlipayClient(PayConfig.gatewayUrl, PayConfig.app_id, PayConfig.merchant_private_key, "json", PayConfig.charset, PayConfig.alipay_public_key, PayConfig.sign_type);

        //AlipayTradePagePayRequest,调用的网站支付接口
        //沙箱环境有多种支付接口可供选择,但请求参数不同,具体参考如下:
        //电脑网站支付:https://opendocs.alipay.com/open/270/105899/
        //其他支付:https://opendocs.alipay.com/open/009ypx
        AlipayTradePagePayRequest request = new AlipayTradePagePayRequest();
        //通知配置参考:https://opensupport.alipay.com/support/helpcenter/193/201602472201?ant_source=manual&recommend=ab2418594aa12994227b51f38a16d735
        //异步通知
        request.setReturnUrl(PayConfig.return_url);
        //同步通知
        request.setNotifyUrl(PayConfig.notify_url);
        /*
         * 请求参数配置
         * 参考API:https://opendocs.alipay.com/apis/api_1/alipay.trade.page.pay#?scene=API002020081300013629请求参数
         */
		//TODO 此处根据需要进行业务处理,为节省事件则静态绑定数据
        String out_trade_no = orderno;
        String total_amount = "0.02";
        String subject = "苹果";
        String body = "用户订购商品个数:2个";
        request.setBizContent("{" +
                "\"out_trade_no\":\"" + out_trade_no + "\"," +
                "\"total_amount\":" + total_amount + "," +
                "\"subject\":\"" + subject + "\"," +
                "\"body\":\"" + body + "\"" +
                "}");

        try {
         	//执行请求,返回body数据
            return alipayClient.pageExecute(request).getBody();
        } catch (AlipayApiException e) {
            return e.getMessage();
        }
	}
8.补充
至此,沙箱调用支付宝的网站支付功能就此实现,对于后续支付成功后需要跳转到自定义的成功页面,在代码中,我们使用了request.setReturnUrl(PayConfig.return_url); 这里,我的配置为:http://localhost:8087/alipayReturnNotice
注意:该地方使用的同步返回,如果是前后端分离的项目 (1)如果在配置中填写的是前端页面完整的访问地址,那么会在付款后自动跳转回目标地址的前端页面。 (2)如果在配置中填写的是后端业务操作的访问地址,那么会在付款后自动跳转回后端,进行相对应的业务操作。 ps:在(2)中对业务操作完成后,如想返回前端页面,可以通过重定向返回到前端。
- 继续编写PayController.java,对支付成功后的回调进行处理:
	/**
     * 网页重定向通知
     * 支付宝同步返回页面GET(买家付款完成以后进行自动跳转)
     */
    @RequestMapping(value = "/alipayReturnNotice")
    public Object alipayReturnNotice(HttpServletRequest request, HttpServletRequest response) throws Exception {
        // 获取支付宝以GET方式提交的反馈信息
        Map<String, String> params = new HashMap();
        Map<String, String[]> requestParams = request.getParameterMap();
        for (Iterator<String> iter = requestParams.keySet().iterator(); iter.hasNext();) {
            String name = (String) iter.next();
            String[] values = (String[]) requestParams.get(name);
            String valueStr = "";
            for (int i = 0; i < values.length; i++) {
                valueStr = (i == values.length - 1) ? valueStr + values[i] : valueStr + values[i] + ",";
            }
            //乱码处理
            valueStr = new String(valueStr.getBytes("ISO-8859-1"), "utf-8");
            params.put(name, valueStr);
        }
        //调用支付宝SDK,进行验签
        boolean signVerified = AlipaySignature.rsaCheckV2(params, PayConfig.alipay_public_key, PayConfig.charset, PayConfig.sign_type);
        //设置返回视图
        ModelAndView mv = new ModelAndView("success");
        // TODO 验签成功后,进行相对应的业务处理
        if (signVerified) {
            // 订单号
            String out_trade_no = new String(request.getParameter("out_trade_no").getBytes("ISO-8859-1"), "UTF-8");
            // 交易号
            String trade_no = new String(request.getParameter("trade_no").getBytes("ISO-8859-1"), "UTF-8");
            // 交易金额
            String total_amount = new String(request.getParameter("total_amount").getBytes("ISO-8859-1"), "UTF-8");
            mv.addObject("out_trade_no", out_trade_no);
            mv.addObject("trade_no", trade_no);
            mv.addObject("total_amount", total_amount);
            mv.addObject("productName", "苹果");
        } else {
            //TODO 验签失败业务处理
        }

        return mv;
    }
- success.html页面
<!DOCTYPE html>
<html xmlns:th="http://www.thymeleaf.org">
<title>支付成功页面</title>
<link th:href="@{/customer/css/bootstrap.css}" rel="stylesheet">
<head>
</head>
<body>
<div class="container">
<div class="row">
<div class="col-md-12"> </div>
</div>
<div class="row">
<div class="col-md-12"> </div>
</div>
<div class="row">
<div class="col-md-12"> </div>
</div>
<div class="row">
<div class="col-md-12"> </div>
</div>
<div class="row">
<div class="col-md-12">
<table class="table table-striped">
<thead>
<tr>
<th scope="col">订单编号</th>
<th scope="col">支付宝交易号</th>
<th scope="col">实付金额</th>
<th scope="col">购买产品</th>
</tr>
</thead>
<tbody>
<tr>
<th scope="row" th:text="${out_trade_no}"></th>
<th scope="row" th:text="${trade_no}"></th>
<th scope="row" th:text="${total_amount}"></th>
<th scope="row" th:text="${productName}"></th>
</tr>
</tbody>
</table>
</div>
</div>
</div>
<script th:src="@{/customer/js/jquery-3.4.0.js}"></script>
<script th:src="@{/customer/js/popper.min.js}"></script>
<script th:src="@{/customer/js/bootstrap.min.js}"></script>
</body>
</html>
自此,项目编写完成 ,进行测试。 

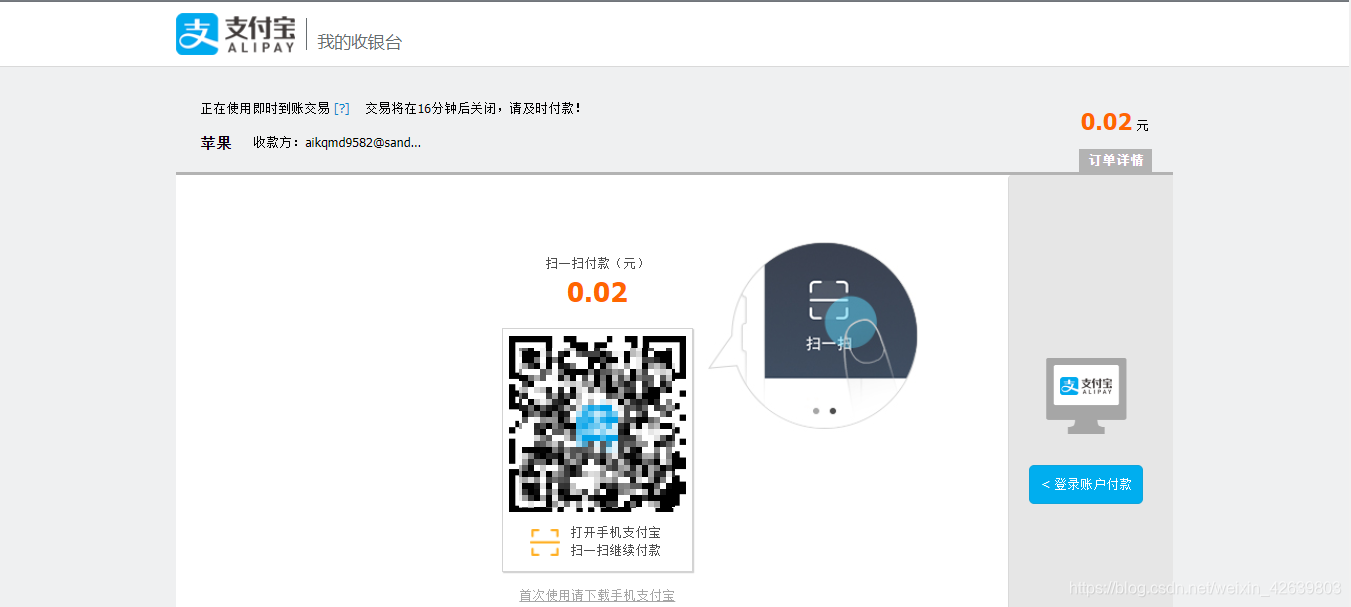
注意,此处需要用沙箱测试应用(Android),并使用沙箱买家账号进行扫码,才可完成支付。电脑或者没有该安卓应用的,可以使用右侧的登录付款,用沙箱买家账号进行登录后付款。上述所说的应用及账号,可在沙箱环境中找到。
 参考项目:tiankong0310/springboot-weixin-alipay 参考资料: 1. 沙箱环境 2. 电脑网站支付 3. 统一收单下单并支付页面接口

 再见二丁目 回复 @断点-含光君


