
Mybatis-plus与Security的简单整合(基于Session)
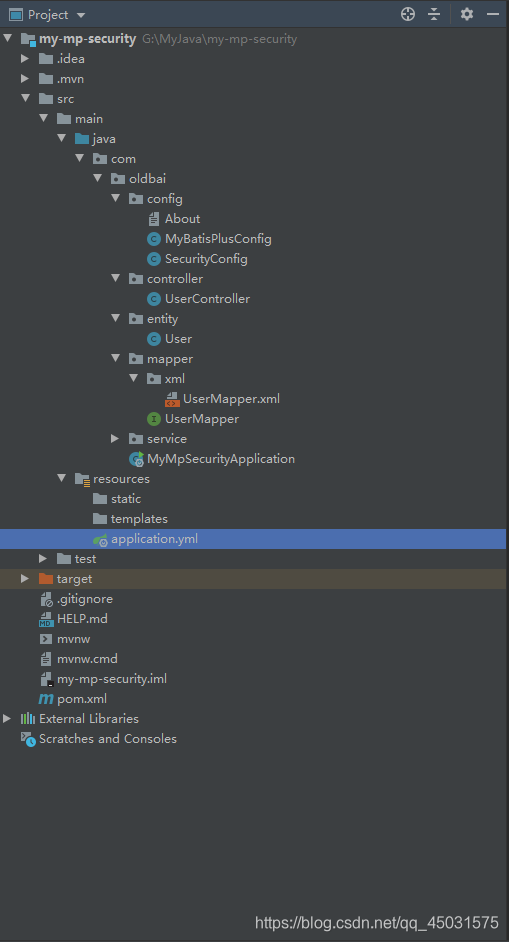
1.文件目录
(1)导入依赖
- pom.xml
<?xml version="1.0" encoding="UTF-8"?>
<project xmlns="http://maven.apache.org/POM/4.0.0" xmlns:xsi="http://www.w3.org/2001/XMLSchema-instance"
         xsi:schemaLocation="http://maven.apache.org/POM/4.0.0 https://maven.apache.org/xsd/maven-4.0.0.xsd">
    <modelVersion>4.0.0</modelVersion>
    <parent>
        <groupId>org.springframework.boot</groupId>
        <artifactId>spring-boot-starter-parent</artifactId>
        <version>2.3.2.RELEASE</version>
        <relativePath/> <!-- lookup parent from repository -->
    </parent>
    <groupId>com.oldbai</groupId>
    <artifactId>my-mp-security</artifactId>
    <version>0.0.1-SNAPSHOT</version>
    <name>my-mp-security</name>
    <description>Demo project for Spring Boot</description>

    <properties>
        <java.version>1.8</java.version>
    </properties>

    <dependencies>
        <dependency>
            <groupId>org.springframework.boot</groupId>
            <artifactId>spring-boot-starter-web</artifactId>
        </dependency>

        <dependency>
            <groupId>mysql</groupId>
            <artifactId>mysql-connector-java</artifactId>
            <scope>runtime</scope>
        </dependency>
        <dependency>
            <groupId>org.projectlombok</groupId>
            <artifactId>lombok</artifactId>
            <optional>true</optional>
        </dependency>

        <!--        security-->
        <dependency>
            <groupId>org.springframework.boot</groupId>
            <artifactId>spring-boot-starter-security</artifactId>
        </dependency>
        <!--添加MyBatis Plus依赖-->
        <dependency>
            <groupId>com.baomidou</groupId>
            <artifactId>mybatis-plus-boot-starter</artifactId>
            <version>3.3.2</version>
        </dependency>
        <!--        逆向工程-->
        <dependency>
            <groupId>com.baomidou</groupId>
            <artifactId>mybatis-plus-generator</artifactId>
            <version>3.3.1.tmp</version>
        </dependency>
        <!--        逆向工程的模板  默认的velocity-->
        <dependency>
            <groupId>org.apache.velocity</groupId>
            <artifactId>velocity-engine-core</artifactId>
            <version>2.0</version>
        </dependency>


        <dependency>
            <groupId>org.springframework.boot</groupId>
            <artifactId>spring-boot-starter-test</artifactId>
            <scope>test</scope>
            <exclusions>
                <exclusion>
                    <groupId>org.junit.vintage</groupId>
                    <artifactId>junit-vintage-engine</artifactId>
                </exclusion>
            </exclusions>
        </dependency>
    </dependencies>

    <build>
        <plugins>
            <plugin>
                <groupId>org.springframework.boot</groupId>
                <artifactId>spring-boot-maven-plugin</artifactId>
            </plugin>
        </plugins>
    </build>

</project>
(2)Mybatis-Plus的简单配制
- MyBatisPlusConfig
package com.oldbai.config;

import com.baomidou.mybatisplus.extension.plugins.OptimisticLockerInterceptor;
import com.baomidou.mybatisplus.extension.plugins.PaginationInterceptor;
import org.mybatis.spring.annotation.MapperScan;
import org.springframework.context.annotation.Bean;
import org.springframework.context.annotation.Configuration;
import org.springframework.transaction.annotation.EnableTransactionManagement;

//Version配置类
@Configuration
@EnableTransactionManagement
@MapperScan("com.oldbai.mapper")
public class MyBatisPlusConfig {
//    Version配置类 乐观锁
    @Bean
    public OptimisticLockerInterceptor optimisticLockerInterceptor(){
        return new OptimisticLockerInterceptor();
    }
//    分页查询配制
    @Bean
    public PaginationInterceptor paginationInterceptor(){
        return new PaginationInterceptor();
    }
}
- 其他生成类使用逆向工程生成即可
- 下面放出主要代码
- User(注意,实现了UserDetails接口)
package com.oldbai.entity;

import java.time.LocalDateTime;
import com.baomidou.mybatisplus.annotation.TableField;
import java.io.Serializable;
import java.util.ArrayList;
import java.util.Collection;
import java.util.List;

import lombok.Data;
import lombok.EqualsAndHashCode;
import lombok.experimental.Accessors;
import org.springframework.security.core.GrantedAuthority;
import org.springframework.security.core.authority.SimpleGrantedAuthority;
import org.springframework.security.core.userdetails.UserDetails;

@Data
@EqualsAndHashCode(callSuper = false)
@Accessors(chain = true)
public class User implements Serializable , UserDetails {

    private static final long serialVersionUID=1L;

      private Integer id;

    private String username;

    private String password;

    private String nickname;

    private Integer enabled;

    private String email;

    private String userface;

    @TableField("regTime")
    private LocalDateTime regTime;

    private String role;


    @Override
    //返回用户的角色信息
    public Collection<? extends GrantedAuthority> getAuthorities() {
        List<SimpleGrantedAuthority> authorities =new ArrayList<>();
        authorities.add(new SimpleGrantedAuthority(role));
        return authorities;
    }

    /**
     *
     * 如果用户未锁定,则返回<code>true</code>,否则返回false
     *
     */
    @Override
    //账号没有过期
    public boolean isAccountNonExpired() {
        return true;
    }

    @Override
    //没有被锁定
    public boolean isAccountNonLocked() {
        return true;
    }

    @Override
    //密码没有过期
    public boolean isCredentialsNonExpired() {
        return true;
    }

    @Override
    //是否可用
    public boolean isEnabled() {
        return true;
    }
}
- UserService(也就是UserServiceImpl)
- 注意实现了UserDetailsService接口
package com.oldbai.service.impl;

import com.baomidou.mybatisplus.core.conditions.query.QueryWrapper;
import com.oldbai.entity.User;
import com.oldbai.mapper.UserMapper;
import com.oldbai.service.IUserService;
import com.baomidou.mybatisplus.extension.service.impl.ServiceImpl;
import org.springframework.beans.factory.annotation.Autowired;
import org.springframework.context.annotation.Bean;
import org.springframework.security.core.userdetails.UserDetails;
import org.springframework.security.core.userdetails.UserDetailsService;
import org.springframework.security.core.userdetails.UsernameNotFoundException;
import org.springframework.security.crypto.bcrypt.BCryptPasswordEncoder;
import org.springframework.stereotype.Component;
import org.springframework.stereotype.Service;

import javax.annotation.Resource;

/**
 * <p>
 *  服务实现类
 * </p>
 *
 * @author oldbai
 * @since 2020-08-07
 */
@Service
public class UserService extends ServiceImpl<UserMapper, User> implements IUserService ,UserDetailsService {

    @Autowired
    UserMapper userMapper;

    /**
     * <p>
     *     我们自己定义的 UserService 需要实现 UserDetailsService 接口,
     *     实现该接口,就要实现接口中的方法,也就是 loadUserByUsername ,
     *     这个方法的参数就是用户在登录的时候传入的用户名,
     *     根据用户名去查询用户信息(查出来之后,系统会自动进行密码比对)
     * </p>
     * @param username
     * @return
     * @throws UsernameNotFoundException
     */
    @Override
    public UserDetails loadUserByUsername(String username) throws UsernameNotFoundException {
        //根据前端传过来的username找到对应的user
        User user = userMapper.selectOne(new QueryWrapper<User>().eq("username",username));
        if (user==null){
            throw new UsernameNotFoundException("用户不存在");
        }
        /**
         * 设置密码编码格式
         */
        String password = user.getPassword();
        BCryptPasswordEncoder bCryptPasswordEncoder = new BCryptPasswordEncoder();
        user.setPassword(bCryptPasswordEncoder.encode(password));
        return user;
    }
}
(3)Security的简单配制
- SecurityConfig
- @EnableTransactionManagement(proxyTargetClass = true)这个注解强行开启某个代理
package com.oldbai.config;

import com.fasterxml.jackson.databind.ObjectMapper;
import com.oldbai.entity.User;
import com.oldbai.service.impl.UserService;
import org.springframework.beans.factory.annotation.Autowired;
import org.springframework.context.annotation.Bean;
import org.springframework.context.annotation.Configuration;
import org.springframework.security.access.hierarchicalroles.RoleHierarchy;
import org.springframework.security.access.hierarchicalroles.RoleHierarchyImpl;
import org.springframework.security.config.annotation.authentication.builders.AuthenticationManagerBuilder;
import org.springframework.security.config.annotation.web.builders.HttpSecurity;
import org.springframework.security.config.annotation.web.configuration.EnableWebSecurity;
import org.springframework.security.config.annotation.web.configuration.WebSecurityConfigurerAdapter;
import org.springframework.security.crypto.bcrypt.BCryptPasswordEncoder;
import org.springframework.transaction.annotation.EnableTransactionManagement;

import java.io.PrintWriter;

/**
 * 跟着松哥的笔记
 */
@EnableWebSecurity
@Configuration
@EnableTransactionManagement(proxyTargetClass = true)
public class SecurityConfig extends WebSecurityConfigurerAdapter {

    @Autowired
    UserService userService;


    @Override
    protected void configure(AuthenticationManagerBuilder auth) throws Exception {
        /**
         * mybatis-plus 联手 Security 数据库认证
         */
        auth.userDetailsService(userService).passwordEncoder(new BCryptPasswordEncoder());

    }

    /**
     * 角色继承
     */
    @Bean
    RoleHierarchy roleHierarchy() {
        RoleHierarchyImpl hierarchy = new RoleHierarchyImpl();
        hierarchy.setHierarchy("ROLE_admin > ROLE_user");
        return hierarchy;
    }

    @Override
    protected void configure(HttpSecurity http) throws Exception {
        http.csrf().disable();
        http.authorizeRequests()
                .antMatchers("/admin/**").hasRole("admin")
                .antMatchers("/user/**").hasRole("user")
                .antMatchers("/swagger-ui.html").permitAll()
                .anyRequest().authenticated();//任何请求登录后即可访问;
        http
                .formLogin()
                .loginProcessingUrl("/doLogin")
                .usernameParameter("username")
                .passwordParameter("password")
                .successHandler((httpServletRequest, httpServletResponse, authentication) -> { //Authentication 参数保存了我们刚刚登录成功的用户信息。登陆成功
                    Object principal = authentication.getPrincipal();
                    User user = (User) principal;
                    user.setPassword(null);
                    //以上三行是手动删除密码
                    httpServletResponse.setContentType("application/json;charset=utf-8");
                    PrintWriter out = httpServletResponse.getWriter();
                    out.write(new ObjectMapper().writeValueAsString(user));
                    out.flush();
                    out.close();
                })
                .failureHandler((httpServletRequest, httpServletResponse, exception) -> {//exception 异常错误。登陆失败
                    httpServletResponse.setContentType("application/json;charset=utf-8");
                    PrintWriter out = httpServletResponse.getWriter();
                    out.write(new ObjectMapper().writeValueAsString(exception.getMessage()));
                    out.flush();
                    out.close();
                })
                .permitAll()
                .and()
                .exceptionHandling()//无状态(未认证)访问
                .authenticationEntryPoint((httpServletRequest, httpServletResponse, exception) -> {
                    httpServletResponse.setContentType("application/json;charset=utf-8");
                    PrintWriter out = httpServletResponse.getWriter();
                    out.write(new ObjectMapper().writeValueAsString("尚未登陆,请登陆!"));//返回JSON数据
                    out.flush();
                    out.close();
                })
                .and()
                .logout()
                .logoutUrl("/logout")
                .logoutSuccessHandler((httpServletRequest, httpServletResponse, authentication) -> {
                    httpServletResponse.setContentType("application/json;charset=utf-8");
                    PrintWriter out = httpServletResponse.getWriter();
                    out.write(new ObjectMapper().writeValueAsString("注销登陆成功"));//注销成功
                    out.flush();
                    out.close();
                });
    }


}
- 自定义验证类UserDetailsService 实现Security框架UserDetailsService的接口,参考实现代码
// 自定义验证类UserDetailsService 实现Security框架UserDetailsService的接口
public class UserDetailServiceImpl implements UserDetailsService {
//修改UserDetailsServiceImpl.java ,添加属性和setter方法 ,修改loadUserByUsername方法
private SellerService sellerService;
public void setSellerService(SellerService sellerService){
this.sellerService=sellerService;
}
@Override
public UserDetails loadUserByUsername(String username) throws UsernameNotFoundException {

/**
*构建角色列表
*/
// 权限集合
List<GrantedAuthority> authList = new ArrayList<>();
// 具体具有什么的权限
authList.add(new SimpleGrantedAuthority("ROLE_SELLER"));
//1 判断用户名是否为null 如果为null 直接返回null
if(username==null){
return null;
}

//得到商家对象

//2 根据用户名到数据库查询 用户对象
Seller seller = sellerService.findOne(username);
//3 如果用户查不到 返回null
if(seller!=null){
//4 如果用户对象查到了 判断用户审核 是否通过 如果未通过返回null
if("1".equals(seller.getStatus())){
//5 返回user 对象 将用户名 密码 返回权限集合
return new User(username,seller.getPassword(),authList);
}

}
return null;
//6 框架帮助比对用户名和密码是否匹配
}
}
(4)SQL测试语句
/*
Navicat MySQL Data Transfer

Source Server         : MyOld
Source Server Version : 50728
Source Host           :
Source Database       : security0

Target Server Type    : MYSQL
Target Server Version : 50728
File Encoding         : 65001

Date: 2020-08-07 20:32:37
*/

SET FOREIGN_KEY_CHECKS=0;

-- ----------------------------
-- Table structure for user
-- ----------------------------
DROP TABLE IF EXISTS `user`;
CREATE TABLE `user` (
  `id` int(11) NOT NULL,
  `username` varchar(255) CHARACTER SET utf8 DEFAULT NULL,
  `password` varchar(255) CHARACTER SET utf8 DEFAULT NULL,
  `nickname` varchar(255) CHARACTER SET utf8 DEFAULT NULL,
  `enabled` tinyint(4) DEFAULT NULL,
  `email` varchar(255) CHARACTER SET utf8 DEFAULT NULL,
  `userface` varchar(255) CHARACTER SET utf8 DEFAULT NULL,
  `regTime` datetime DEFAULT NULL,
  `role` varchar(255) CHARACTER SET utf8 DEFAULT NULL,
  PRIMARY KEY (`id`)
) ENGINE=InnoDB DEFAULT CHARSET=latin1;

-- ----------------------------
-- Records of user
-- ----------------------------
INSERT INTO `user` VALUES ('1', 'zhangsan', '123456', '张三', '1', 'zhangsan@qq.com', null, '2020-08-07 19:13:38', 'ROLE_admin');
INSERT INTO `user` VALUES ('2', 'lisi', '123456', '李四', '1', 'lisi@qq.com', '', '2020-08-07 19:13:38', 'ROLE_user');
INSERT INTO `user` VALUES ('3', 'wangwu', '123456', '王五', '1', 'wangwu@qq.com', '', '2020-08-07 19:13:38', 'ROLE_peo');
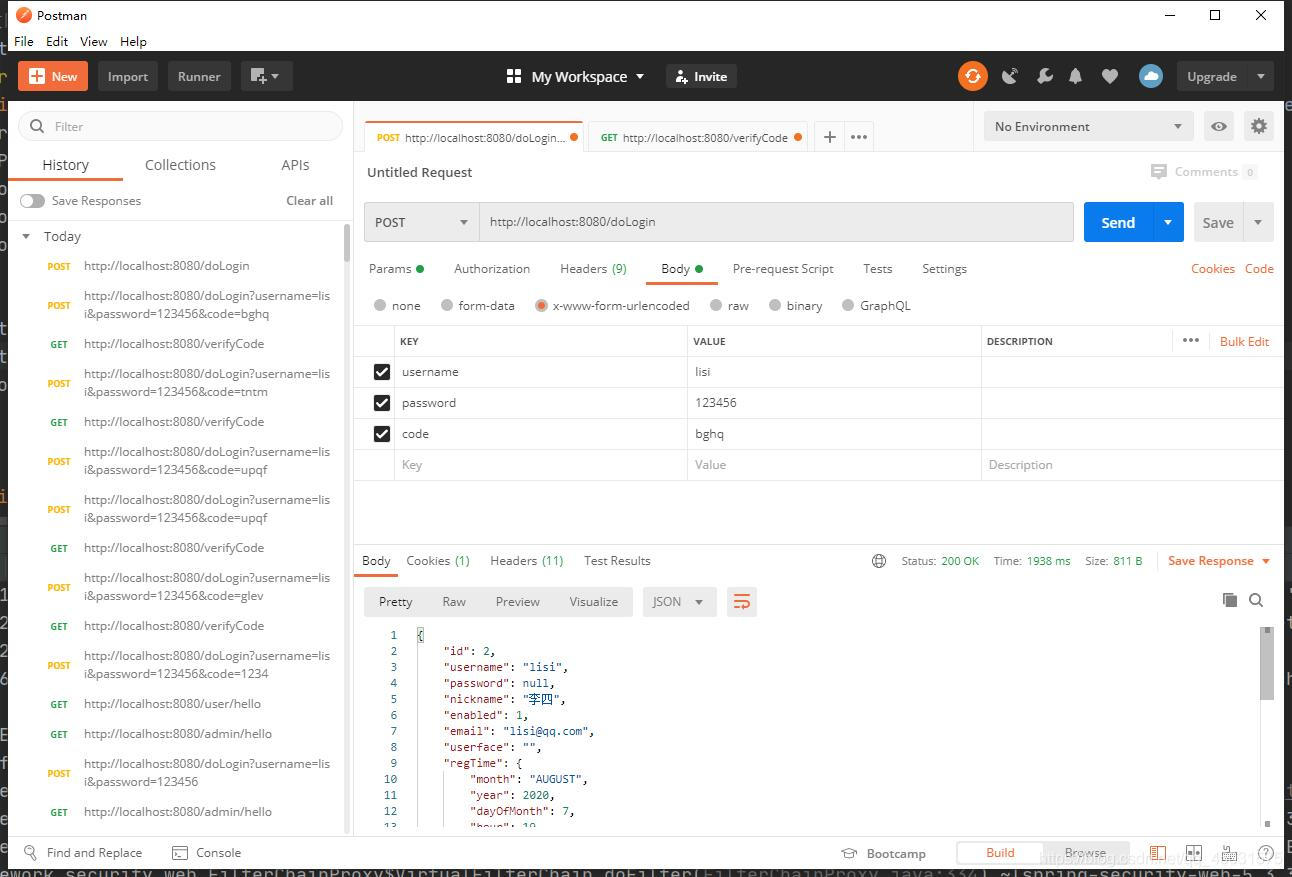
(5)实验截图
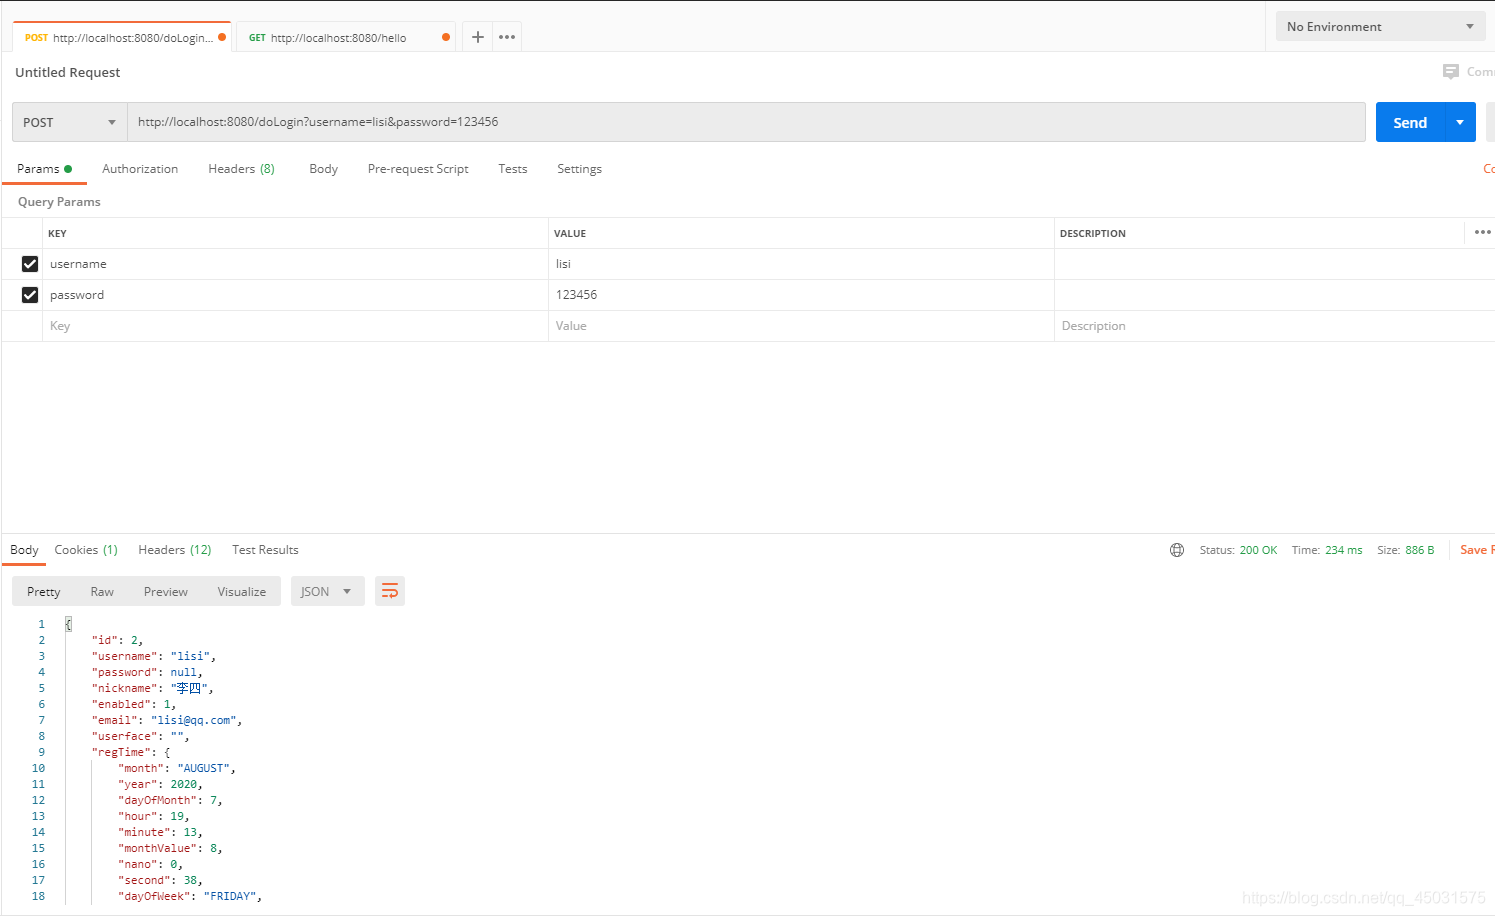

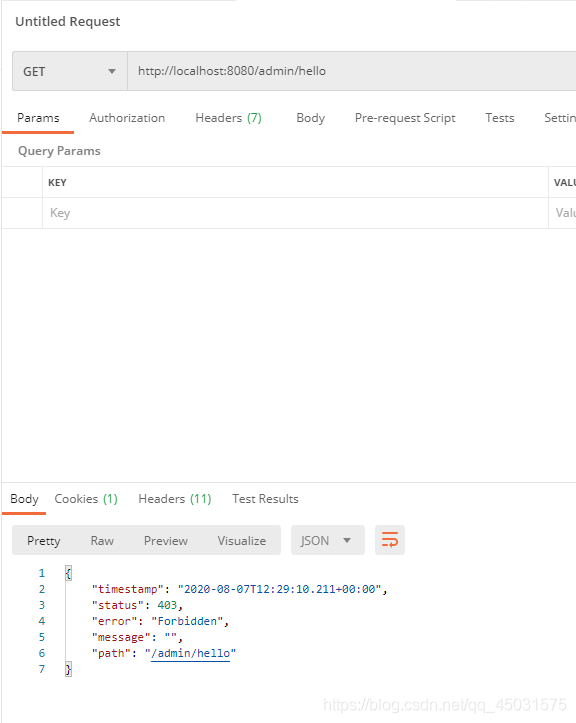
- 只截一部分实验截图
2.自定义验证码
(1)自定义验证码生成工具和接口
- 生成工具
- VerifyCode
package com.oldbai.Util;

import javax.imageio.ImageIO;
import java.awt.*;
import java.awt.image.BufferedImage;
import java.io.IOException;
import java.io.OutputStream;
import java.util.Random;

/**
 * 生成验证码的工具类
 */
public class VerifyCode {
    private int width = 100;// 生成验证码图片的宽度
    private int height = 50;// 生成验证码图片的高度
    private String[] fontNames = { "宋体", "楷体", "隶书", "微软雅黑" };
    private Color bgColor = new Color(255, 255, 255);// 定义验证码图片的背景颜色为白色
    private Random random = new Random();
    private String codes = "0123456789abcdefghijklmnopqrstuvwxyzABCDEFGHIJKLMNOPQRSTUVWXYZ";
    private String text;// 记录随机字符串

    /**
     * 获取一个随意颜色
     *
     * @return
     */
    private Color randomColor() {
        int red = random.nextInt(150);
        int green = random.nextInt(150);
        int blue = random.nextInt(150);
        return new Color(red, green, blue);
    }

    /**
     * 获取一个随机字体
     *
     * @return
     */
    private Font randomFont() {
        String name = fontNames[random.nextInt(fontNames.length)];
        int style = random.nextInt(4);
        int size = random.nextInt(5) + 24;
        return new Font(name, style, size);
    }

    /**
     * 获取一个随机字符
     *
     * @return
     */
    private char randomChar() {
        return codes.charAt(random.nextInt(codes.length()));
    }

    /**
     * 创建一个空白的BufferedImage对象
     *
     * @return
     */
    private BufferedImage createImage() {
        BufferedImage image = new BufferedImage(width, height, BufferedImage.TYPE_INT_RGB);
        Graphics2D g2 = (Graphics2D) image.getGraphics();
        g2.setColor(bgColor);// 设置验证码图片的背景颜色
        g2.fillRect(0, 0, width, height);
        return image;
    }

    public BufferedImage getImage() {
        BufferedImage image = createImage();
        Graphics2D g2 = (Graphics2D) image.getGraphics();
        StringBuffer sb = new StringBuffer();
        for (int i = 0; i < 4; i++) {
            String s = randomChar() + "";
            sb.append(s);
            g2.setColor(randomColor());
            g2.setFont(randomFont());
            float x = i * width * 1.0f / 4;
            g2.drawString(s, x, height - 15);
        }
        this.text = sb.toString();
        drawLine(image);
        return image;
    }

    /**
     * 绘制干扰线
     *
     * @param image
     */
    private void drawLine(BufferedImage image) {
        Graphics2D g2 = (Graphics2D) image.getGraphics();
        int num = 5;
        for (int i = 0; i < num; i++) {
            int x1 = random.nextInt(width);
            int y1 = random.nextInt(height);
            int x2 = random.nextInt(width);
            int y2 = random.nextInt(height);
            g2.setColor(randomColor());
            g2.setStroke(new BasicStroke(1.5f));
            g2.drawLine(x1, y1, x2, y2);
        }
    }

    public String getText() {
        return text;
    }

    public static void output(BufferedImage image, OutputStream out) throws IOException {
        ImageIO.write(image, "JPEG", out);
    }
}
- 实装接口
- LoginController
package com.oldbai.controller;

import com.oldbai.Util.VerifyCode;
import org.springframework.web.bind.annotation.GetMapping;
import org.springframework.web.bind.annotation.RestController;

import javax.imageio.ImageIO;
import javax.servlet.http.HttpServletRequest;
import javax.servlet.http.HttpServletResponse;
import javax.servlet.http.HttpSession;
import java.awt.image.BufferedImage;
import java.io.FileOutputStream;
import java.io.IOException;

@RestController
public class LoginController {

    //提供生成图片的接口
    @GetMapping("/verifyCode")
    public void verifyCode(HttpSession session, HttpServletResponse response) throws IOException {
        VerifyCode code = new VerifyCode();
        BufferedImage image = code.getImage();
//        检查是否生成图片
        ImageIO.write(image,"JPEG",new FileOutputStream("F:/a.jpg"));
        String text = code.getText();
        session.setAttribute("verify_code",text);
        VerifyCode.output(image,response.getOutputStream());
    }
}
(2)自定义验证码过滤器
- 自定义过滤器 LoginFilter
package com.oldbai.config;

import com.fasterxml.jackson.databind.ObjectMapper;
import org.springframework.context.annotation.Bean;
import org.springframework.stereotype.Component;

import javax.servlet.*;
import javax.servlet.http.HttpServletRequest;
import javax.servlet.http.HttpServletResponse;
import java.io.IOException;
import java.io.PrintWriter;

/**
 * 自定义拦截器
 * 拦截验证码验证
 * 它是要在用户验证之前验证
 */
@Component
public class VerificationCodeFilter extends GenericFilter {
    @Override
    public void doFilter(ServletRequest servletRequest, ServletResponse servletResponse, FilterChain filterChain) throws IOException, ServletException {
        /**
         * 校验验证码
         */
        HttpServletRequest request = (HttpServletRequest) servletRequest;
        HttpServletResponse response = (HttpServletResponse) servletResponse;
        /**
         * 如果是登陆请求 则走这个过滤器
         * 否则不走
         */
        if("POST".equals(request.getMethod())&&"/doLogin".equals(request.getServletPath())){
            String code = request.getParameter("code");//传过来的验证码
            String verify_code = (String) request.getSession().getAttribute("verify_code");//Session里面存的验证码
            if (code == null || "".equals(code) || !verify_code.toLowerCase().equals(code.toLowerCase())){
                //验证码不正确
                //向前端返回json数据
                response.setContentType("application/json;charset=utf-8");
                PrintWriter out = response.getWriter();
                out.write(new ObjectMapper().writeValueAsString("验证码填写错误"));//这里需要定义一个封装统一返回结果
                out.flush();
                out.close();
            }else {
                filterChain.doFilter(request,response);
            }
        }else {
            filterChain.doFilter(request,response);
        }
    }
}
- 实装进入 securityConfing
package com.oldbai.config;

import com.fasterxml.jackson.databind.ObjectMapper;
import com.oldbai.entity.User;
import com.oldbai.service.impl.UserService;
import org.springframework.beans.factory.annotation.Autowired;
import org.springframework.context.annotation.Bean;
import org.springframework.context.annotation.Configuration;
import org.springframework.security.access.hierarchicalroles.RoleHierarchy;
import org.springframework.security.access.hierarchicalroles.RoleHierarchyImpl;
import org.springframework.security.config.annotation.authentication.builders.AuthenticationManagerBuilder;
import org.springframework.security.config.annotation.web.builders.HttpSecurity;
import org.springframework.security.config.annotation.web.configuration.EnableWebSecurity;
import org.springframework.security.config.annotation.web.configuration.WebSecurityConfigurerAdapter;
import org.springframework.security.crypto.bcrypt.BCryptPasswordEncoder;
import org.springframework.security.web.authentication.UsernamePasswordAuthenticationFilter;
import org.springframework.transaction.annotation.EnableTransactionManagement;

import java.io.PrintWriter;

/**
 * 跟着松哥的笔记
 */
@EnableWebSecurity
@Configuration
@EnableTransactionManagement(proxyTargetClass = true)
public class SecurityConfig extends WebSecurityConfigurerAdapter {

    @Autowired
    UserService userService;

    /**
     * 添加验证码过滤器
     */
    @Autowired
    VerificationCodeFilter verificationCodeFilter;


    @Override
    protected void configure(AuthenticationManagerBuilder auth) throws Exception {
        /**
         * mybatis-plus 联手 Security 数据库认证
         */
        auth.userDetailsService(userService).passwordEncoder(new BCryptPasswordEncoder());

    }

    /**
     * 角色继承
     */
    @Bean
    RoleHierarchy roleHierarchy() {
        RoleHierarchyImpl hierarchy = new RoleHierarchyImpl();
        hierarchy.setHierarchy("ROLE_admin > ROLE_user > ROLE_peo");
        hierarchy.setHierarchy("ROLE_user > ROLE_peo");
        return hierarchy;
    }

    @Override
    protected void configure(HttpSecurity http) throws Exception {
        /**
         * 实装添加过滤器
         * 添加在用户验证之前
         */
        http.addFilterBefore(verificationCodeFilter, UsernamePasswordAuthenticationFilter.class);


        http.csrf().disable();
        http.authorizeRequests()
                .antMatchers("/admin/**").hasRole("admin")
                .antMatchers("/user/**").hasRole("user")
                .antMatchers("/verifyCode").permitAll()
                .anyRequest().authenticated();//任何请求登录后即可访问;
        http.formLogin()
                .loginProcessingUrl("/doLogin")
                .usernameParameter("username")
                .passwordParameter("password")
                .successHandler((httpServletRequest, httpServletResponse, authentication) -> { //Authentication 参数保存了我们刚刚登录成功的用户信息。登陆成功
                    Object principal = authentication.getPrincipal();
                    User user = (User) principal;
                    user.setPassword(null);
                    //以上三行是手动删除密码
                    httpServletResponse.setContentType("application/json;charset=utf-8");
                    PrintWriter out = httpServletResponse.getWriter();
                    out.write(new ObjectMapper().writeValueAsString(user));
                    out.flush();
                    out.close();
                })
                .failureHandler((httpServletRequest, httpServletResponse, exception) -> {//exception 异常错误。登陆失败
                    httpServletResponse.setContentType("application/json;charset=utf-8");
                    PrintWriter out = httpServletResponse.getWriter();
                    out.write(new ObjectMapper().writeValueAsString(exception.getMessage()));
                    out.flush();
                    out.close();
                })
                .permitAll()
                .and()
                .exceptionHandling()//无状态(未认证)访问
                .authenticationEntryPoint((httpServletRequest, httpServletResponse, exception) -> {
                    httpServletResponse.setContentType("application/json;charset=utf-8");
                    PrintWriter out = httpServletResponse.getWriter();
                    out.write(new ObjectMapper().writeValueAsString("尚未登陆,请登陆!"));//返回JSON数据
                    out.flush();
                    out.close();
                })
                .and()
                .logout()
                .logoutUrl("/logout")
                .logoutSuccessHandler((httpServletRequest, httpServletResponse, authentication) -> {
                    httpServletResponse.setContentType("application/json;charset=utf-8");
                    PrintWriter out = httpServletResponse.getWriter();
                    out.write(new ObjectMapper().writeValueAsString("注销登陆成功"));//注销成功
                    out.flush();
                    out.close();
                });
    }


}
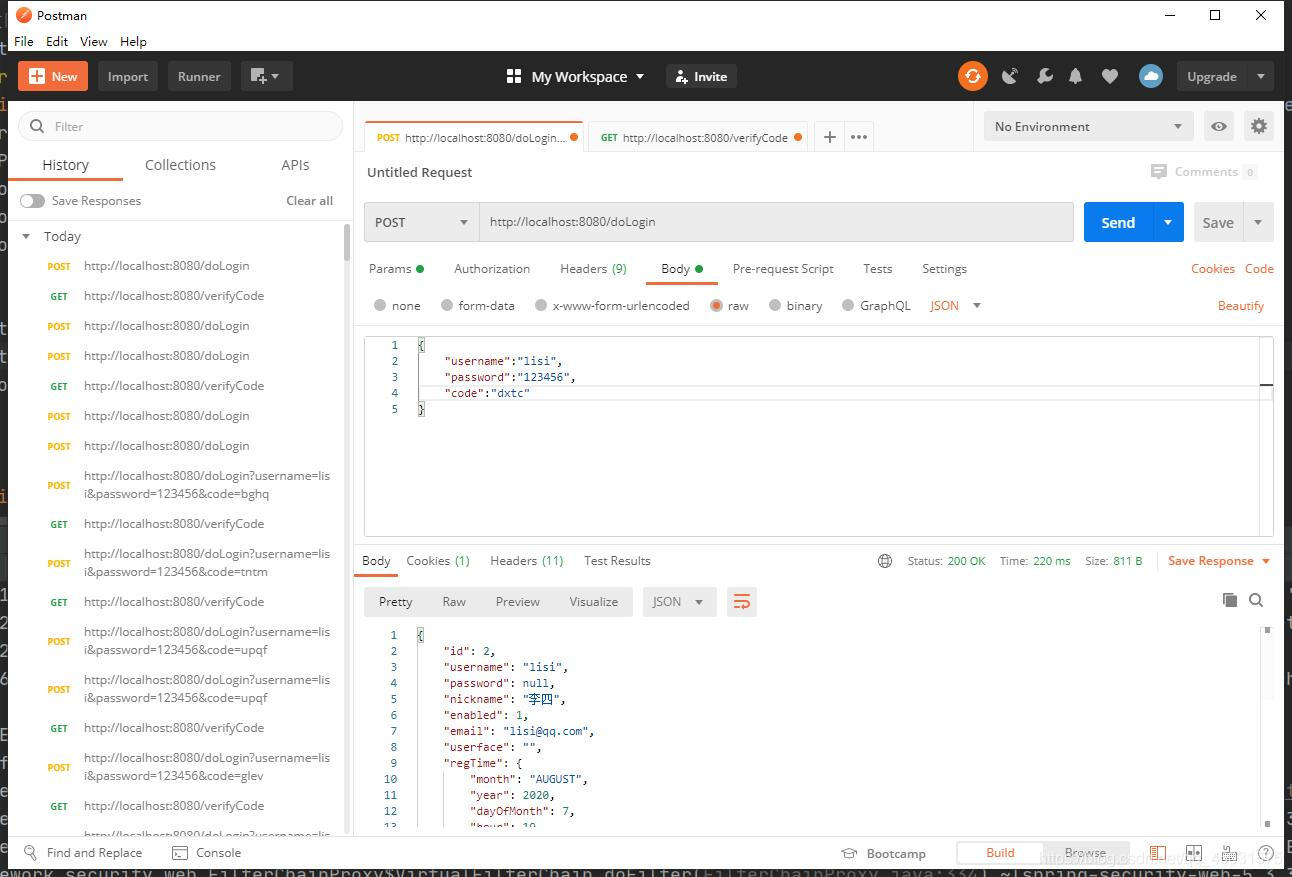
3.前后端登陆JSON交互
(1)先创建一个过滤器
- LoginFilter
package com.oldbai.config;

import com.fasterxml.jackson.databind.ObjectMapper;
import org.springframework.http.MediaType;
import org.springframework.security.authentication.AuthenticationServiceException;
import org.springframework.security.authentication.UsernamePasswordAuthenticationToken;
import org.springframework.security.core.Authentication;
import org.springframework.security.core.AuthenticationException;
import org.springframework.security.web.authentication.UsernamePasswordAuthenticationFilter;
import javax.servlet.http.HttpServletRequest;
import javax.servlet.http.HttpServletResponse;
import java.io.IOException;
import java.util.Map;

/**
 * 在登陆时进行过滤 把它变成 json格式
 * 顺便进行验证码的核对
 */
public class LoginFilter extends UsernamePasswordAuthenticationFilter {

    @Override
    public Authentication attemptAuthentication(HttpServletRequest request, HttpServletResponse response) throws AuthenticationException {
        /**
         * 是否为POST请求
         */
        if (!request.getMethod().equals("POST")) {
            throw new AuthenticationServiceException(
                    "Authentication method not supported: " + request.getMethod());
        }
        /**
         * 既支持Key - value
         * 又支持 json
         */
        String verify_code = (String) request.getSession().getAttribute("verify_code");//Session里面存的验证码
        if (request.getContentType().equals(MediaType.APPLICATION_JSON_VALUE) || request.getContentType().equals(MediaType.APPLICATION_JSON_UTF8_VALUE)) {
            /**
             * 符合任意一个就认为是 json 格式
             * 否则就是 key - value 格式
             */

            /**
             * 可以用一个实体类接收,也可以用一个Map来接收
             */
            Map<String, String> loginData = null;
            try {
                loginData = new ObjectMapper().readValue(request.getInputStream(), Map.class);
            } catch (IOException e) {
                e.printStackTrace();
            } finally {
                String code = loginData.get("code");
                //定义一个验证码验证的方法
                checlCode(code, verify_code);
            }
            String username = loginData.get(getUsernameParameter());
            String password = loginData.get(getPasswordParameter());

            if (username == null) {
                username = "";
            }

            if (password == null) {
                password = "";
            }

            username = username.trim();

            UsernamePasswordAuthenticationToken authRequest = new UsernamePasswordAuthenticationToken(
                    username, password);

            // Allow subclasses to set the "details" property
            setDetails(request, authRequest);

            return this.getAuthenticationManager().authenticate(authRequest);
        } else {
            //非json格式登陆也要进行验证验证码
            checlCode(request.getParameter("code"), verify_code);
            return super.attemptAuthentication(request, response);
        }
    }

    private void checlCode(String code, String verify_code) {
        if (code == null || "".equals(code) || !verify_code.toLowerCase().equals(code.toLowerCase())){
            //验证码不正确
            //抛出一个异常即可
            throw new AuthenticationServiceException("验证码输入错误");
        }
    }
}
(2)添加配制(改动较大)
- SecurityConfig
package com.oldbai.config;

import com.fasterxml.jackson.databind.ObjectMapper;
import com.oldbai.entity.User;
import com.oldbai.service.impl.UserService;
import org.springframework.beans.factory.annotation.Autowired;
import org.springframework.context.annotation.Bean;
import org.springframework.context.annotation.Configuration;
import org.springframework.security.access.hierarchicalroles.RoleHierarchy;
import org.springframework.security.access.hierarchicalroles.RoleHierarchyImpl;
import org.springframework.security.config.annotation.authentication.builders.AuthenticationManagerBuilder;
import org.springframework.security.config.annotation.web.builders.HttpSecurity;
import org.springframework.security.config.annotation.web.configuration.EnableWebSecurity;
import org.springframework.security.config.annotation.web.configuration.WebSecurityConfigurerAdapter;
import org.springframework.security.core.Authentication;
import org.springframework.security.core.AuthenticationException;
import org.springframework.security.crypto.bcrypt.BCryptPasswordEncoder;
import org.springframework.security.web.authentication.AuthenticationFailureHandler;
import org.springframework.security.web.authentication.AuthenticationSuccessHandler;
import org.springframework.security.web.authentication.UsernamePasswordAuthenticationFilter;
import org.springframework.transaction.annotation.EnableTransactionManagement;

import javax.servlet.ServletException;
import javax.servlet.http.HttpServletRequest;
import javax.servlet.http.HttpServletResponse;
import java.io.IOException;
import java.io.PrintWriter;

/**
 * 跟着松哥的笔记
 */
@EnableWebSecurity
@Configuration
@EnableTransactionManagement(proxyTargetClass = true)
public class SecurityConfig extends WebSecurityConfigurerAdapter {

    @Autowired
    UserService userService;
    /**
     * 登陆过滤器 JSON交互
     */
    @Bean
    LoginFilter loginFilter() throws Exception{
        LoginFilter loginFilter = new LoginFilter();
//        登陆成功回调
        loginFilter.setAuthenticationSuccessHandler(new AuthenticationSuccessHandler() {
            @Override
            public void onAuthenticationSuccess(HttpServletRequest request, HttpServletResponse response, Authentication authentication) throws IOException, ServletException, IOException {
                Object principal = authentication.getPrincipal();
                User user = (User) principal;
                user.setPassword(null);
                //以上三行是手动删除密码
                response.setContentType("application/json;charset=utf-8");
                PrintWriter out = response.getWriter();
                out.write(new ObjectMapper().writeValueAsString(user));
                out.flush();
                out.close();
            }
        });
//        登陆失败回调
        loginFilter.setAuthenticationFailureHandler(new AuthenticationFailureHandler() {
            @Override
            public void onAuthenticationFailure(HttpServletRequest request, HttpServletResponse response, AuthenticationException exception) throws IOException, ServletException {
                response.setContentType("application/json;charset=utf-8");
                PrintWriter out = response.getWriter();
                out.write(new ObjectMapper().writeValueAsString(exception.getMessage()));
                out.flush();
                out.close();
            }
        });
        loginFilter.setAuthenticationManager(authenticationManagerBean());
        loginFilter.setFilterProcessesUrl("/doLogin");
        return loginFilter;
    }

    @Override
    protected void configure(AuthenticationManagerBuilder auth) throws Exception {
        /**
         * mybatis-plus 联手 Security 数据库认证
         */
        auth.userDetailsService(userService).passwordEncoder(new BCryptPasswordEncoder());

    }

    /**
     * 角色继承
     */
    @Bean
    RoleHierarchy roleHierarchy() {
        RoleHierarchyImpl hierarchy = new RoleHierarchyImpl();
        hierarchy.setHierarchy("ROLE_admin > ROLE_user > ROLE_peo");
        hierarchy.setHierarchy("ROLE_user > ROLE_peo");
        return hierarchy;
    }

    @Override
    protected void configure(HttpSecurity http) throws Exception {
        /**
         * 替换之前登陆过滤器
         */
        http.addFilterAfter(loginFilter(),UsernamePasswordAuthenticationFilter.class);


        http.csrf().disable();

        http.authorizeRequests()
                .antMatchers("/admin/**").hasRole("admin")
                .antMatchers("/user/**").hasRole("user")
                .antMatchers("/verifyCode").permitAll()
                .anyRequest().authenticated();//任何请求登录后即可访问;
        http.exceptionHandling()//无状态(未认证)访问
                .authenticationEntryPoint((httpServletRequest, httpServletResponse, exception) -> {
                    httpServletResponse.setContentType("application/json;charset=utf-8");
                    PrintWriter out = httpServletResponse.getWriter();
                    out.write(new ObjectMapper().writeValueAsString("尚未登陆,请登陆!"));//返回JSON数据
                    out.flush();
                    out.close();
                })
                .and()
                .logout()
                .logoutUrl("/logout")
                .logoutSuccessHandler((httpServletRequest, httpServletResponse, authentication) -> {
                    httpServletResponse.setContentType("application/json;charset=utf-8");
                    PrintWriter out = httpServletResponse.getWriter();
                    out.write(new ObjectMapper().writeValueAsString("注销登陆成功"));//注销成功
                    out.flush();
                    out.close();
                });
    }


}
4.写在最后
- 这是MyBatis-plus 与 security 的整合,还有JPA 还有MyBatis等,自定义的整合就是这样,非自定义的上一篇博客也有。作为自己的笔记,需要的时候直接拿。
- 总结:
- 1.先创建项目,导入MyBatis-plus 与 Security 的依赖
- 2.添加MyBatis-plus的配制文件并进行单元测试是否成功连接数据库
- 3.添加Security 的配置文件并启用,由于是基于数据库的认证,所以需要对User类和UserServiceImpl进行实现接口,重写方法等,最后再配置文件中启用 ==auth.userDetailsService(userService).passwordEncoder(new BCryptPasswordEncoder());==,接着进行测试是否能认证成功正确登陆
- 4.要进行前后端分离,使用JSON交互登陆,实现LoginFilter 过滤器。最后进行测试是否登陆拦截成功,是否能通过JSON或者key/value形式登陆。
5.最后的目录总图


