虽然我们不知道是android开发人员还是Web开发人员,有需要就整一个出来是吧。
前面呢我们已经整了一个图片浏览的控件了
接下来为了我们的摸鱼君课程顺利完成,我们再整一个评论组件。
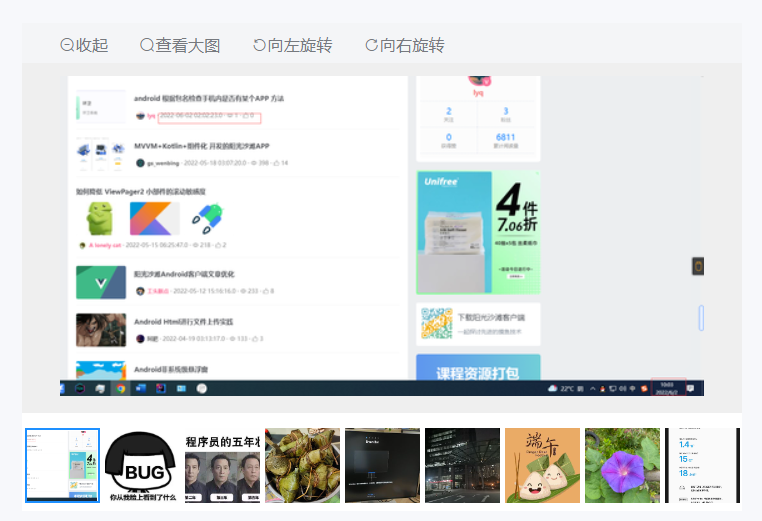
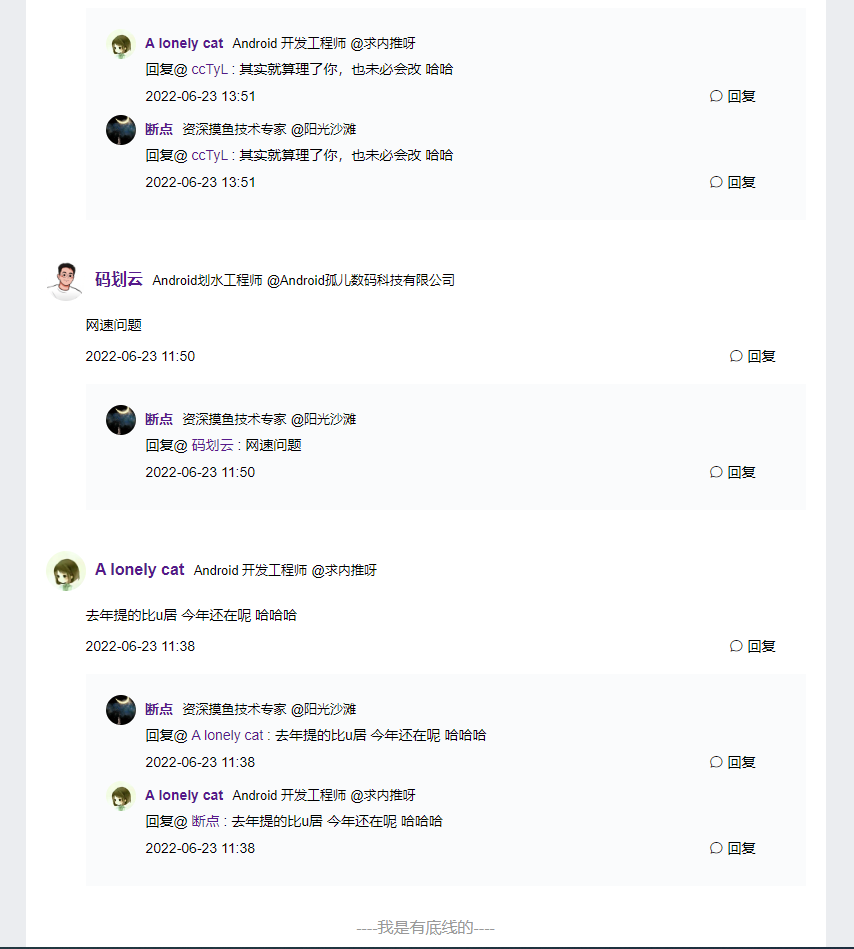
先看东西

好不容易截图这么张的
那代码是如何的呢?

以上,就是纯操作dom写的原生js代码,一口气写完的。
写完我就忘记了。
今天 我们才不这么写这个评论组件,我们使用vue.js来写。
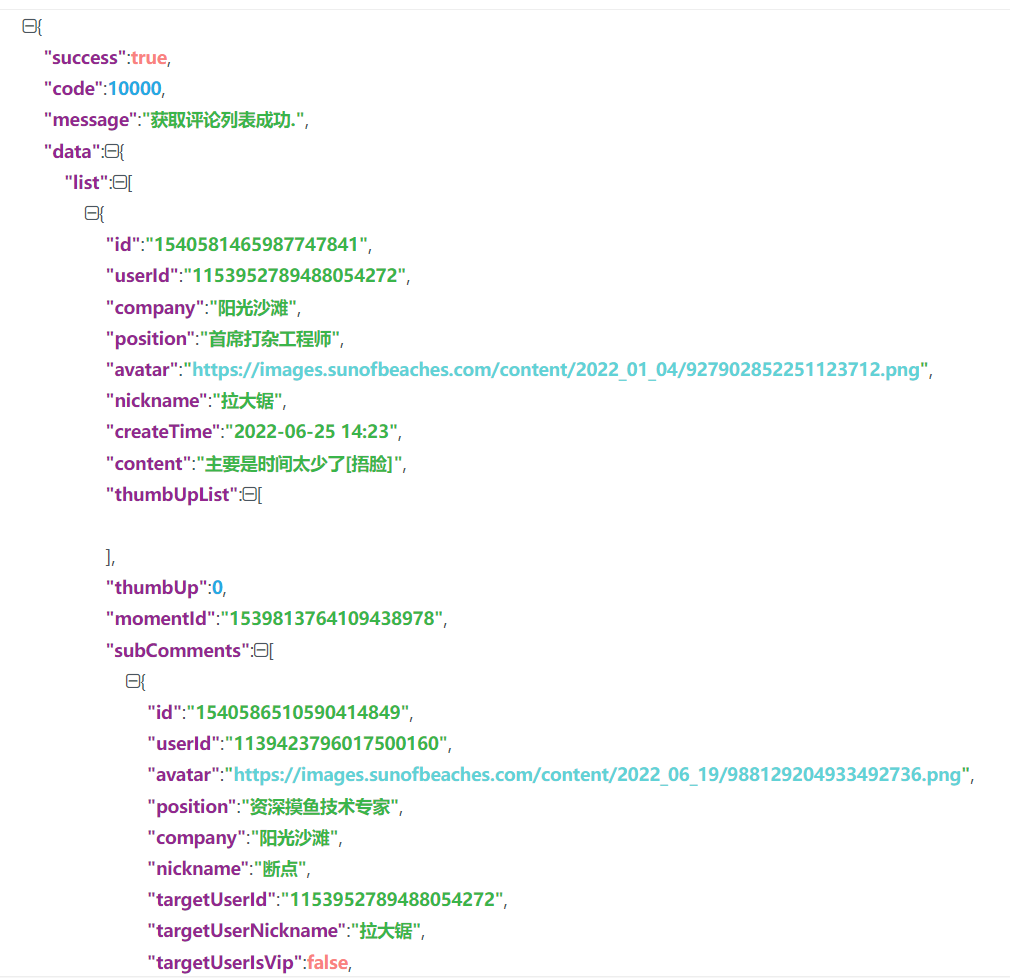
数据
同学们可以拿一个接口模拟请求一下,然后就得到数据了。
https://api.sunofbeaches.com/ct/moyu/comment/1539813764109438978/1?sort=1
以上就可以获取到数据了
在我们的vue.js项目里怎么请求数据的话就不和大家细说了,你看我们网站任何一个前端的课程都有教这玩意的。
组件化
我们为了做得通用一点,就把这个评论模块做成一个组件。
对于组件来说,外部要提供数据,也就是设置数据进来,然后组件进行渲染。
- 评论数据
- 是否有更多
对于外问来说,关心的是评论内容和加载更多的动作。
- 用户回复评论
- 触发加载更多
渲染代码
<template>
  <!--
  需要的数据:
  - 评论列表
  对外暴露的数据:
  - 评论数据
  - 加载更多
  -->
  <div class="comment-list">
    <div class="comment-item" v-for="(item,index) in commentList" :key="index">
      <div class="cm-user-info-part">
        <img class="cm-avatar" :src="item.avatar">
        <a :href="'https://www.sunofbeach.net/u/'+item.userId" target="_blank"> <span class="cm-nickname"
                                                                                      v-text="item.nickname"></span></a>
        <span class="cm-position" v-text="item.position?item.position:'无业'"></span>
        <span class="cm-company" v-text="item.company?'@'+item.company:'@游民'"></span>
      </div>
      <div class="cm-content-part">
        <div class="cm-content">
          <p v-text="item.content"></p>
        </div>
        <div class="cm-action-part">
          <span v-text="item.createTime"></span>
          <span class="cm-comment-response el-icon-chat-round"> 回复</span>
        </div>
        <div class="cm-sub-comment-list">
          <div class="cm-sub-comment-item" v-for="(subItem,subIndex) in item.subComments" :key="subIndex">
            <div class="cm-user-info-part">
              <img class="cm-avatar" :src="subItem.avatar">
              <a :href="'https://www.sunofbeach.net/u/'+subItem.userId" target="_blank">
                <span class="cm-nickname" v-text="subItem.nickname"></span>
              </a>
              <span class="cm-position" v-text="subItem.position?subItem.position:'无业'"></span>
              <span class="cm-company" v-text="subItem.company?'@'+subItem.company:'@游民'"></span>
            </div>
            <div class="cm-sub-content-part">
              <div class="cm-content">
                <span>回复@</span>
                <a target="_blank" :href="'https://www.sunofbeach.net/u/'+subItem.targetUserId">{{subItem.targetUserNickname}}</a>
                :
                <span v-text="item.content"></span>
              </div>
              <div class="cm-action-part">
                <span v-text="item.createTime"></span>
                <span class="cm-comment-response el-icon-chat-round"> 回复</span>
              </div>
            </div>
          </div>
        </div>
      </div>
    </div>
    <div class="cm-has-more" v-if="hasMore">
      >>>加载更多>>>
    </div>
    <div class="cm-no-more" v-if="!hasMore">
      ----我是有底线的----
    </div>
  </div>
</template>
<script>
  export default {
    props: {
      commentList: Array,
      hasMore: {
        default: false,
        type: Boolean
      }
    }
  }
</script>
<style>
  .cm-has-more:hover {
    opacity: .6;
  }

  .cm-has-more {
    cursor: pointer;
  }

  .cm-has-more, .cm-no-more {
    text-align: center;
    padding: 10px;
    color: #999999;
  }

  body {
    background: #EBEDF0;
  }

  .cm-sub-content-part {
    margin-left: 40px;
    margin-bottom: 10px;
  }

  .cm-sub-comment-list {
    padding: 20px;
    margin-top: 20px;
    background: #FAFBFC;
  }

  .cm-comment-response:hover {
    opacity: .8;
  }

  .cm-comment-response {
    cursor: pointer;
  }

  .cm-action-part {
    display: flex;
    margin-right: 30px;
    justify-content: space-between;
    font-size: 14px;
    margin-top: 10px;
    align-items: center;
  }

  .cm-content {
    font-size: 14px;
  }

  .cm-content-part {
    margin-left: 40px;
  }

  .comment-list {
    background: white;
  }

  .comment-item {
    padding: 20px;
  }

  .cm-user-info-part .cm-position, .cm-user-info-part .cm-company {
    font-size: 13px;
  }

  .cm-user-info-part .cm-nickname {
    font-size: 16px;
    font-weight: 600;
    margin-left: 5px;
    margin-right: 5px;
  }

  .cm-sub-comment-item .cm-user-info-part {
    line-height: 30px;
  }

  .cm-user-info-part {
    line-height: 40px;
  }

  .cm-user-info-part .cm-avatar {
    width: 40px;
    height: 40px;
    border-radius: 50%;
    vertical-align: middle !important;
  }


  .cm-sub-comment-item .cm-avatar {
    width: 30px;
    height: 30px;
  }

  .cm-sub-comment-item .cm-nickname {
    font-size: 14px;
    font-weight: 600;
    margin-left: 5px;
    margin-right: 5px;
  }


</style>
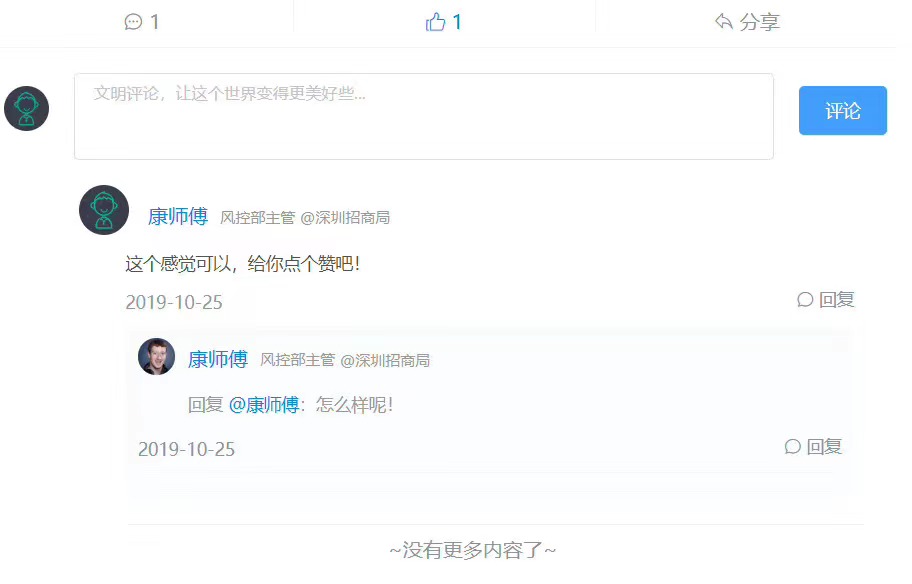
渲染出来的效果是如何的呢?
输入框
加入了输入框和样式
<template>
  <!--
  需要的数据:
  - 评论列表
  对外暴露的数据:
  - 评论数据
  - 加载更多
  -->
  <div class="comment-list">
    <div class="comment-item" v-for="(item,index) in commentList" :key="index">
      <div class="cm-user-info-part">
        <img class="cm-avatar" :src="item.avatar">
        <span class="cm-nickname" v-text="item.nickname"></span>
        <span class="cm-position" v-text="item.position?item.position:'无业'"></span>
        <span class="cm-company" v-text="item.company?'@'+item.company:'@游民'"></span>
      </div>
      <div class="cm-content-part">
        <div class="cm-content">
          <p v-text="item.content"></p>
        </div>
        <div class="cm-action-part">
          <span v-text="item.createTime"></span>
          <span class="cm-comment-response el-icon-chat-round"> 回复</span>
        </div>
        <div class="cm-sub-comment-list">
          <div class="cm-sub-comment-item" v-for="(subItem,subIndex) in item.subComments" :key="subIndex">
            <div class="cm-user-info-part">
              <img class="cm-avatar" :src="subItem.avatar">
              <span class="cm-nickname" v-text="subItem.nickname"></span>
              <span class="cm-position" v-text="subItem.position?subItem.position:'无业'"></span>
              <span class="cm-company" v-text="subItem.company?'@'+subItem.company:'@游民'"></span>
            </div>
            <div class="cm-sub-content-part">
              <div class="cm-content">
                <span>回复@</span>
                <a :href="'https://www.sunofbeach.net/u/'+subItem.targetUserId">{{subItem.targetUserNickname}}</a>
                :
                <span v-text="item.content"></span>
              </div>
              <div class="cm-action-part">
                <span v-text="item.createTime"></span>
                <span class="cm-comment-response el-icon-chat-round"> 回复</span>
              </div>
            </div>
          </div>
        </div>
        <div class="cm-input-box">
          <el-input resize="none" class="cm-reply-box" type="textarea">

          </el-input>
          <span class="cm-reply-btn">回复</span>
        </div>
      </div>
    </div>
  </div>
</template>
样式
  .cm-input-box {
    margin-top: 10px;
    margin-bottom: 10px;
  }

  .cm-reply-box {
    width: 610px;
  }

  .comment-list {
    background: white;
  }
结果如何呢?
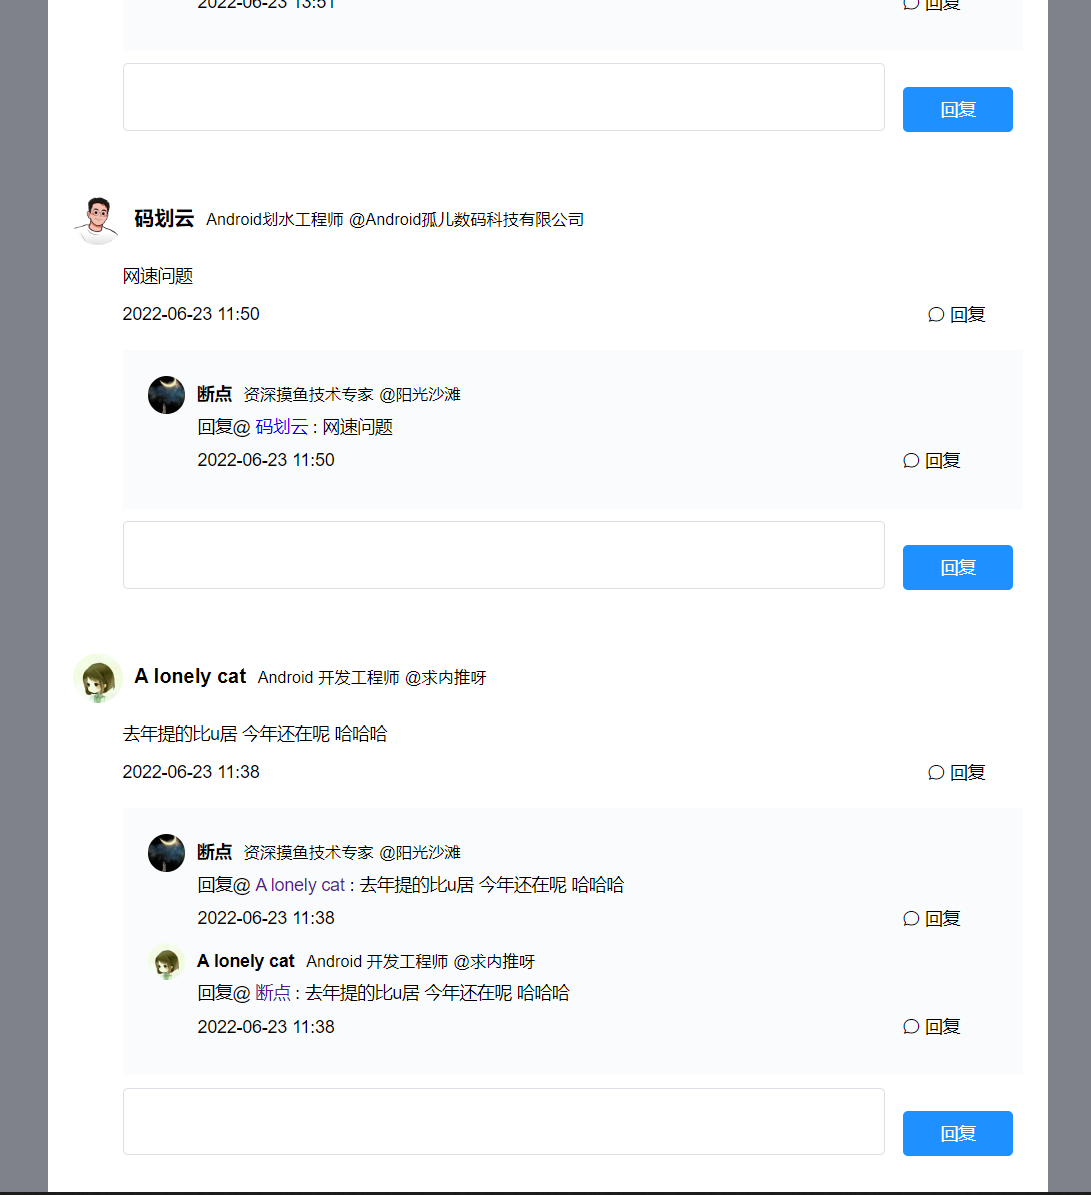
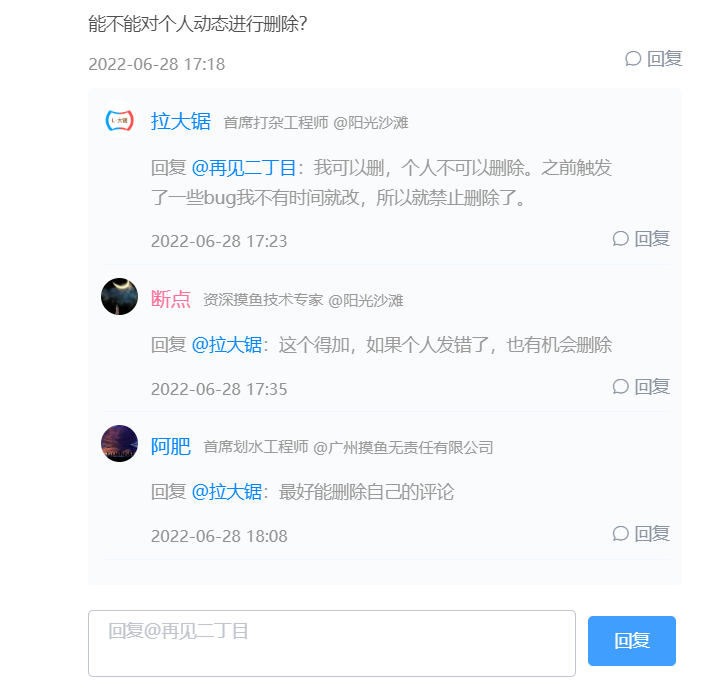
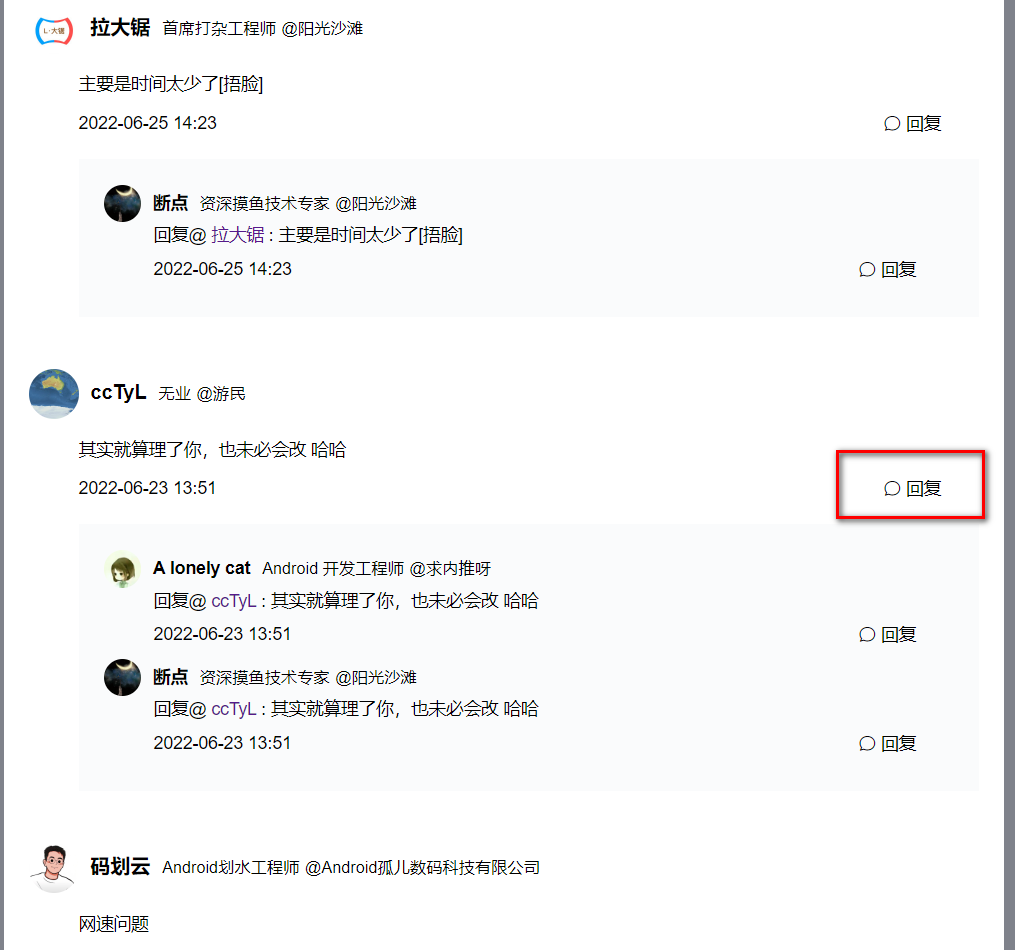
开始的时候,这些输入框是隐藏的,当我们点击回复的时候,显示对应的输入框,并且提示:回复@xxx
于是,我们添加点击事件,并且要找到某个输入框模块我们可以加id,id就是当前评论的id,这样子我们可以轻易地通过item拿到对应的div
 <div class="cm-input-box" :id="'cm-input-'+item.id">
          <el-input resize="none" class="cm-reply-box" type="textarea">

          </el-input>
          <span class="cm-reply-btn">回复</span>
        </div>
并且样式display改成none
  .cm-input-box {
    display: none;
    margin-top: 10px;
    margin-bottom: 10px;
  }
当我们点击这个时
        <div class="cm-action-part">
          <span v-text="item.createTime"></span>
          <span class="cm-comment-response el-icon-chat-round" @click="onItemReply(item)"> 回复</span>
        </div>
点击事件处理:
    methods: {
      onItemReply(item) {
        let commentId = item.id;
        let inputBox = document.getElementById('cm-input-' + commentId);
        if (inputBox) {
          inputBox.style.display = 'block';
        }
      }
    }

到此,我们item的回复点击就可以显示了,那么子回复呢?
也是一样的嘛,只是parent评论的ID控制显示
onSubItemReply(subItem) {
        let commentId = subItem.commentId;
        let inputBox = document.getElementById('cm-input-' + commentId);
        if (inputBox) {
          inputBox.style.display = 'block';
        }
      },
接下来就是显placeholder的事情了。
 onItemReply(item) {
        let commentId = item.id;
        let inputBoxContainer = document.getElementById('cm-input-' + commentId);
        if (inputBoxContainer) {
          inputBoxContainer.style.display = 'block';
        }
        let inputBox = document.getElementById('cm-input-box-' + commentId);
        if (inputBox) {
          inputBox.focus();
          inputBox.setAttribute('placeholder', '回复@' + item.nickname);
        }
      }

回复按钮
当我们点击回复按钮的时候,我们应该把什么数据暴露出去呢?
- 当前用户ID(不需要,你只要携带token向后台请求,后台就知道你是谁了)
- 目标用户ID(不需要,防止造假,后台自动通过评论ID查询到对应的用户)
- 被评论的ID(需要的,后台就是通过这个来知道你评论了谁)
- 评论内容(需要的)后台要知道你评论了什么
- 动态ID(需要,后台根据动态ID查询评论内容)
所以我们只要暴露给外面3个数据就可以了。
怎么暴露出去呢?
可以参考一下vue.js官网的教程>组件>自定义事件

所以我们代码这么写:
给"回复"添加点击事件,并且参数是item 拿到评论ID,动态ID,从输入框中获取到评论内容
$emit('onReply', 评论内容,动态ID,被回复的评论ID)
回复按钮点击:
<span class="cm-reply-btn" @click="doReply(item.id)">回复</span>
以下就是js代码了:
export default {
    props: {
      commentList: Array
    },
    data() {
      return {
        comment: {
          commendId: '',
          content: '',
          momentId: ''
        },
        subComment: {
          commendId: '',
          content: '',
          momentId: ''
        },
        isSubReply: false
      }
    },
    methods: {
      doReply(boxId) {
        let inputBox = document.getElementById('cm-input-box-' + boxId);
        if (this.isSubReply) {
          this.subComment.content = inputBox.value;
          //通知外部
          this.$emit('onSubReply', this.subComment);
        } else {
          this.comment.content = inputBox.value;
          this.$emit('onReply', this.comment);
        }
      },
      onSubItemReply(subItem) {
        this.isSubReply = true;
        let commentId = subItem.commentId;
        this.handleInputBox(commentId, subItem.nickname);
        //赋值给到评论
        this.subComment.commendId = subItem.id;
        this.subComment.momentId = subItem.momentId;
      },
      handleInputBox(id, nickname) {
        let inputBoxContainer = document.getElementById('cm-input-' + id);
        if (inputBoxContainer) {
          inputBoxContainer.style.display = 'block';
        }
        let inputBox = document.getElementById('cm-input-box-' + id);
        if (inputBox) {
          inputBox.focus();
          inputBox.value = '';
          inputBox.setAttribute('placeholder', '回复@' + nickname);
        }
      },
      onItemReply(item) {
        this.isSubReply = false;
        let commentId = item.id;
        this.handleInputBox(commentId, item.nickname);
        //赋值给到评论
        this.comment.commendId = commentId;
        this.comment.momentId = item.momentId;
      }
    }
  }
使用
  <div class="container">
    <CommentListView
      :comment-list="commentList"
      @onSubReply="onSubReply"
      @onReply="onReply"/>
  </div>
js的代码
 methods: {
      onReply(comment) {
        console.log(comment)
      },
      onSubReply(subComment) {
        console.log(subComment);
      }
    },
到这里就可以去传评论了,根据结果加载新的评论既可。
使用请同学们看我们的摸鱼君项目实战课程吧,感谢大家的支持。
欢迎大家关注我们的公众号。