

前言,我的博客也是前些日子才完工的,但是我想着有些地方优化一下,首先是门户个人信息的头像,不然注册的用户清一色的头像,就做了一下门户个人信息的头像修改,这里遇到的一些坑记录一下。
一、准备工作
使用管理端个人信息的头像修改组件,github地址:https://github.com/dai-siki/vue-image-crop-upload
二、去参考管理端代码
我一开始以为很简单,于是毫不费劲的就把代码copy完了,以为完事,然后刷新一下,error,程序员最怕的字眼,如图: 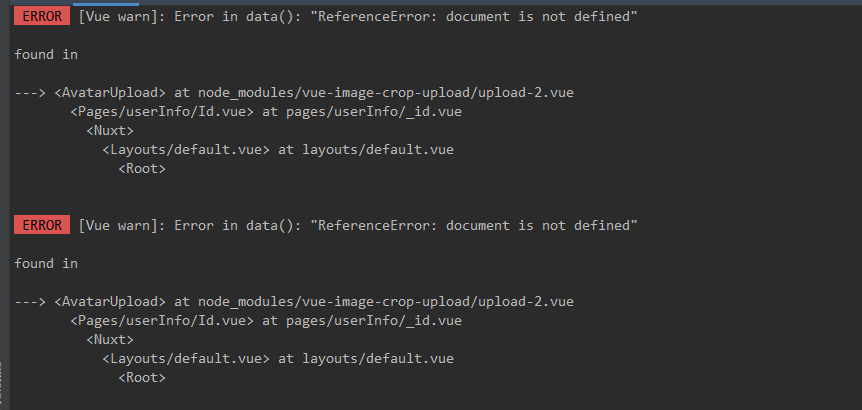
然而发现事情并没有想象的那么简单,找了半天想去群里问一下,然后群里也没大神回我,再翻看一遍,似乎记起来了些什么,对,组件注册方式不一样。
三、修改代码
首先plugins目录下创建一个avatar-upload.js文件,注册组件
import Vue from 'vue';
import avatarUpload from 'vue-image-crop-upload/upload-2.vue'

Vue.component('avatar-upload', avatarUpload)
第二步,再去配置文件nuxt.config.js配置如下代码:
  // Plugins to run before rendering page: https://go.nuxtjs.dev/config-plugins
  plugins: [
    {
      src: '@/plugins/avatar-upload',
      ssr: false
    }
  ],
到这就改的差不多了。
四、完整的代码
html代码
<template>
  <div class="change-avatar-dialog">
      <avatar-upload field="file"
                     @crop-upload-success="cropUploadSuccess"
                     @crop-upload-fail="cropUploadFail"
                     v-model="showAvatarCutter"
                     :width="300"
                     :height="300"
                     url="/admin/image/avatar"
                     img-format="png">
      </avatar-upload>
    </div>
</template>

<script type="text/javascript">
export default {
  data(){
    return{
		showAvatarCutter: false,
	  }
	},
  methods:{

    /**
     * 上传完成再去更新数据
     */
        cropUploadSuccess(response){
      // console.log(response);
      // console.log(field);
      //上传成功
      if (response.code === api.SUCCESS_CODE_200) {
        this.userEntity.avatar = response.path;
        this.userInfo.avatar = response.path;
        this.$message.success('头像上传成功!');
        // this.showAvatarCutter = false;  //不能这样关闭,需要使用定义好的关闭
        console.log("头像 ===> " + this.userEntity.avatar)
      }else {
        this.$message.error('头像上传失败!');
      }
    },

    cropUploadFail(){
      this.$message.error("上传失败!")
    },

    showAvatarDialog(){
      // 本人才能修改自己的头像
      if (this.currentUserId === this.parUserId){
        // console.log("点击....")
        this.showAvatarCutter = true;
        this.isEditorMode = true;
      }
    },
  }
}
</script>

<style></style>
基本上都在上面了,要注意的地方就是注册组件!(完结)
本文由
程序员soulmate
原创发布于
阳光沙滩
,未经作者授权,禁止转载

 soulmate 回复 @断点-含光君
  拉大锯 回复 @soulmate


