项目搭建-前提
本次我们使用vue cli进行基本环境的搭建。
需要配置的环境
nodejs
npm
淘宝镜像的配置
npm国外镜像比较慢,使用淘宝镜像会快一些
执行以下代码:
//配置
npm config set registry https://registry.npm.taobao.org

//验证
npm config get registry
Vue cli的安装及使用
//1. 安装vue cli
npm install -g @vue/cli

//2. 找一个目录,使用命令行开始创建项目
vue create sunofbeach_weapp
创建项目时,命令行会询问一些配置,我们选择 默认的 Vue2 babel eslint 即可 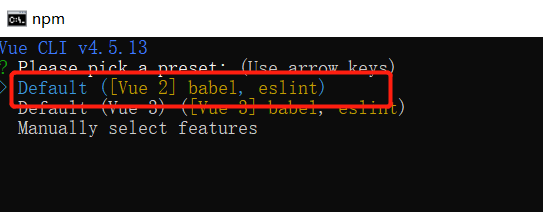
创建完成会提示如下:
�  Successfully created project sunofbeach_weapp.
�  Get started with the following commands:

 $ cd sunofbeach_weapp
 $ npm run serve
按照他的提示,我们 cd进入目录,执行 npm run serve
提示如下:
表示创建成功。可以通过http://localhost:8080/进行项目的访问了,可以看到一个欢迎页面
  App running at:
  - Local:   http://localhost:8080/
  - Network: http://172.19.41.141:8080/

  Note that the development build is not optimized.
  To create a production build, run npm run build.
项目的清理
默认会给我们生成一些文件,我们不需要,进行一些清理
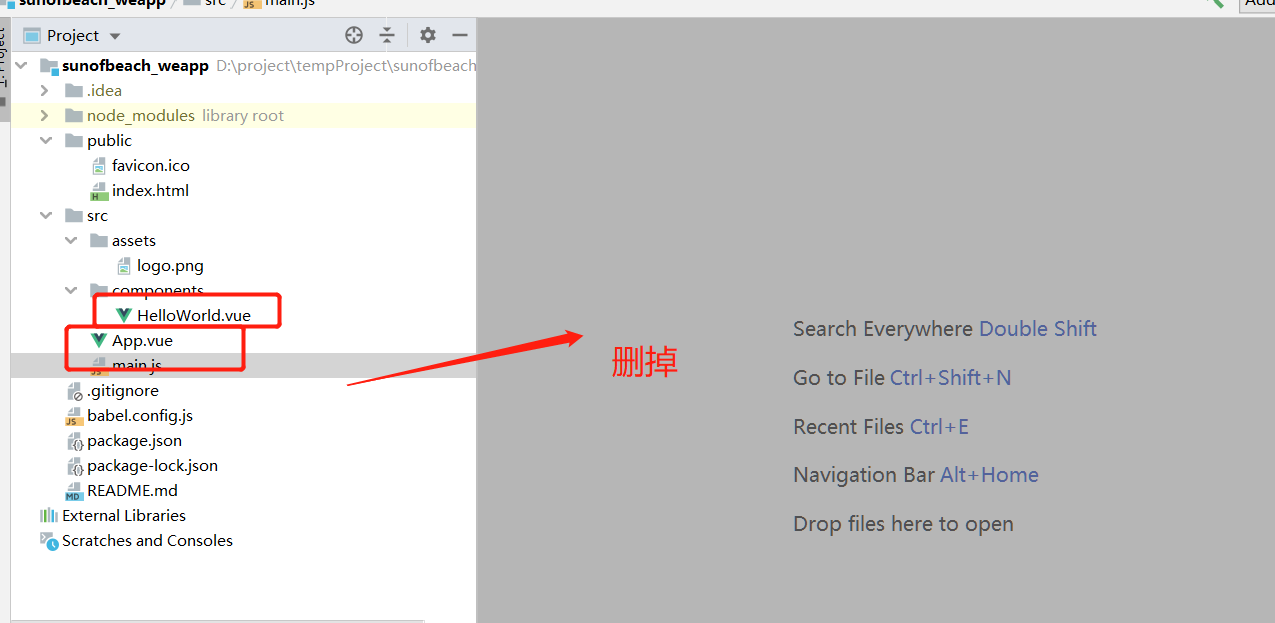 删掉之后,项目会报错。我们接下来自己写好入口。
项目入口
App.vue(放置于src下第一层)
<template>
    <div>
            这是一个app
    </div>
</template>

<script>
    export default {
        name: "App"
    }
</script>

<style >

</style>
import Vue from 'vue'  //引入vue本身
import App from './App.vue' //引入根组件
Vue.config.productionTip = false


new Vue({
  render: h => h(App),
}).$mount('#app') //这里挂载的是 public/index.html 的id为app的 div
修改之后,项目会自动重新加载,如果访问 http://localhost:8080/ 能看到刚刚我们在app.vue写的文字,那就说明配置正确了

 断点-含光君 回复 @拉大锯