UIButton
//定义
class UIButton : UIControl
UIButton是最常见的控制之一,继承自 UIControl。
使用UIButton的一般步骤是:
- 设置按钮的类型type
- 设置按钮的title 或 image,设置或调整按钮的大小和位置
- 设置按钮的响应事件
初始化一个最简单的按钮
class ViewController: UIViewController {
	override func viewDidLoad() {
		super.viewDidLoad()
		// Do any additional setup after loading the view.
		print("HELLO BUTTON")
		initView()
	}

	  func initView(){
		// 初始化一个按钮
		let button = UIButton(type: .system)
		//设置按钮位置和大小
		button.frame = CGRect(x:100, y:100, width:100, height:30)
		//设置按钮文字
		button.setTitle("正常状态下的按钮", for:.normal)
		button.setTitle("高亮状态的文字", for:.highlighted)
		view.addSubview(button)
	}

}
按钮类型ButtonType
public enum ButtonType : Int {
        //不使用系统默认样式,可以自定义按钮外观
        case custom = 0
  	//该属性使得按钮呈现默认风格。
        @available(iOS 7.0, *)
        case system = 1
  	//该属性使得按钮呈现一个带感叹号!的详情图标。
        case detailDisclosure = 2
  	//该属性使得按钮呈现一个图标,同Detail Disclosure。
        case infoLight = 3
  	//该属性使得按钮呈现一个图标,同Detail Disclosure。
        case infoDark = 4
        //该属性使得按钮呈现一个带+号的联系人图标。
        case contactAdd = 5
        @available(iOS 13.0, *)
   	//该属性使得按钮呈现一个带X号的关闭图标。
        case close = 7
        public static var roundedRect: UIButton.ButtonType { get }
}
UIControl.State
// 即设置不同状态展示不同文字
button.setTitle("普通状态", for: .normal)
button.setTitle("高亮状态", for: .highlighted)
button.setTitle("禁用状态", for: .disabled)
button.setTitle("选择状态", for: .selected)
button.setTitle("获取焦点状态", for: .focused)
button.setTitle("禁用状态", for: .disabled)


//显示文字颜色
button.setTitleColor(UIColor.red, for: .normal)
button.setTitleColor(UIColor.blue, for: .highlighted)
button.setTitleColor(UIColor.cyan, for: .selected)
button.setTitleColor(UIColor.gray, for: .disabled)

//阴影文字颜色设置
button.setTitleShadowColor(UIColor.cyan, for: .normal)
button.setTitleShadowColor(UIColor.green, for: .highlighted)
button.setTitleShadowColor(UIColor.brown, for: .disabled)
button.setTitleShadowColor(UIColor.darkGray, for: .selected)
设置button字体
//UIButton设置字体大小
button.titleLabel?.font = UIFont.systemFont(ofSize: 10)
设置边框宽度/颜色, 以及圆角
button.layer.borderWidth = 1
button.layer.borderColor = UIColor.gray.cgColor
button.layer.cornerRadius = 10
是否禁用
button.isEnabled = true
button.isEnabled = false

// 可以配合设置禁用状态的文字和字体颜色
button.setTitle("禁用状态", for: .disabled)
button.setTitleColor(UIColor.gray, for: .disabled)
按钮背景颜色和背景图片
button.backgroundColor = UIColor.lightGray
button.setBackgroundImage(UIImage(named:"pdf_bg"), for: .normal)
按钮文字过长如何显示
// 按钮文字过长如何显示
button1.setTitle("普通状态,文字很长,文字很长", for: .normal)
button1.setTitleColor(UIColor.red, for: .normal)
默认是中间省略。
可以修改 titleLabel 的 lineBreakMode 属性,便可以调整按钮在文字超长的情况下如何显示,以及是否换行。
// 结尾省略
button1.titleLabel?.lineBreakMode = .byTruncatingTail
// 最多展示2行
button1.titleLabel?.numberOfLines = 2


// 具体可以设置的值如下:
public enum NSLineBreakMode : Int {
    // 以单词为单位换行,以单词为单位截断
    case byWordWrapping = 0 // Wrap at word boundaries, default
    // 以字符为单位换行,以字符为单位截断
    case byCharWrapping = 1 // Wrap at character boundaries
    // 以单词为单位换行。以字符为单位截断
    case byClipping = 2 // Simply clip
    // 以单词为单位换行。如果是单行,则开始部分有省略号。如果是多行,则中间有省略号,省略号后面有4个字符。
    case byTruncatingHead = 3 // Truncate at head of line: "...wxyz"
    //以单词为单位换行。无论是单行还是多行,都是末尾有省略号。
    case byTruncatingTail = 4 // Truncate at tail of line: "abcd..."
    // 以单词为单位换行。无论是单行还是多行,都是中间有省略号,省略号后面只有2个字符。
    case byTruncatingMiddle = 5 // Truncate middle of line:  "ab...yz"
}
按钮点击事件
// 点击事件,无参数传递,可以添加多个事件处理
button.addTarget(self, action: #selector(touchUpInsideAction), for: .touchUpInside)
button.addTarget(self, action: #selector(ViewController.touchUpInsideAction1), for: .touchUpInside)
// 事件处理action
@objc func touchUpInsideAction() {
   print("touchUpInsideAction")
}
@objc func touchUpInsideAction1() {
   print("touchUpInsideAction1" )
}


// 点击事件,传递button参数
button.addTarget(self, action: #selector(touchUpInsideAction2(button:)), for: .touchUpInside)
// 事件处理action
@objc func touchUpInsideAction2(button:UIButton){
  print("touchUpInsideAction2:" + String(button.isEnabled))
}
UIControl.Event
对于button的触摸点击事件,有不同的类型:
public struct Event : OptionSet {
	//单点触摸,按下
        public static var touchDown: UIControl.Event { get }
	//多点触摸,按钮,次数大于1,即按钮第2、或第3根手指时
        public static var touchDownRepeat: UIControl.Event { get }
	//控件内部拖拽
        public static var touchDragInside: UIControl.Event { get }
	//触摸在控件外拖拽
        public static var touchDragOutside: UIControl.Event { get }
	//从外拖拽到内部
        public static var touchDragEnter: UIControl.Event { get }
	//从内部拖拽到外部
        public static var touchDragExit: UIControl.Event { get }
	//控件内触摸,并抬起手指
        public static var touchUpInside: UIControl.Event { get }
	//在控件之外触摸,并抬起手指
        public static var touchUpOutside: UIControl.Event { get }
	//触摸取消事件
        public static var touchCancel: UIControl.Event { get }

}
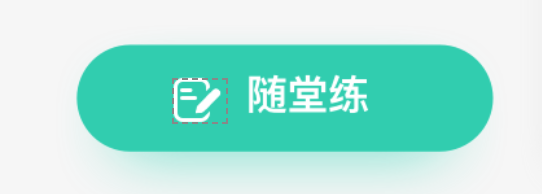
自定义一个按钮
iOS中的自定义控件,和android 类似,不外乎也是继承、组合,加上自己绘制等方式。
作为入门练习,可以先了解一下,深入的会在实战环节进行介绍:

首先创建一个新文件,选择xcode菜单,File -> New -> File,选择:Cocoa Touch Class 类型:
MyButton.swift:
class MyButton: UIButton {

	override init(frame: CGRect) {
		super.init(frame:frame)
		setImage(UIImage(named: "practice"), for:.normal)
		setTitleColor(UIColor.black, for: .normal)
		contentHorizontalAlignment = .center
		// fillCode
		backgroundColor = UIColor(red: 0.13, green: 0.81, blue: 0.69, alpha: 1)
		layer.cornerRadius = 30
		titleLabel?.font = UIFont.systemFont(ofSize: 20)
		setTitleColor(UIColor.white, for: .normal)

	}

	//根据Xcode的提示:重写控件的init(frame方法)或者init()方法.必须重写 init?(coder NSCoder)
	required init?(coder: NSCoder) {
		fatalError("init(coder:) has not been implemented")
	}

	override func layoutSubviews() {
		super.layoutSubviews()
		 imageView!.frame.origin.x = 40
	}

}
使用:
class ViewController: UIViewController {

	lazy var myBtn : MyButton = MyButton()

	override func viewDidLoad() {
		super.viewDidLoad()
		initView()
	}

	func initView() {
		// 添加自定义Button
		myBtn.frame = CGRect(x: 0, y: 0, width: 200, height: 60)
		myBtn.setTitle("随堂练", for: .normal)
		myBtn.center = view.center
      		myBtn.addTarget(self, action: #selector(ViewController.myBtnClick), for: .touchUpInside)
		view.addSubview(myBtn)
	}

 	 @objc func myBtnClick(){
		print("myBtnClick clicked" )
	}

}


